A professional styling kit isn’t a collection of items; it’s a strategic system of solutions designed to anticipate and neutralize on-set disasters before they happen.
- Your credibility and ability to secure loans without a portfolio hinge on demonstrating professionalism through intangible assets like polished pull letters and speculative mood boards.
- Mastering a « damage triage » protocol for borrowed samples is non-negotiable and builds more trust with PR agencies than a stack of tear sheets.
Recommendation: Stop thinking about what’s *in* your kit and start thinking about what problems your kit *solves*. This mindset is the single biggest differentiator between a junior assistant and a lead stylist.
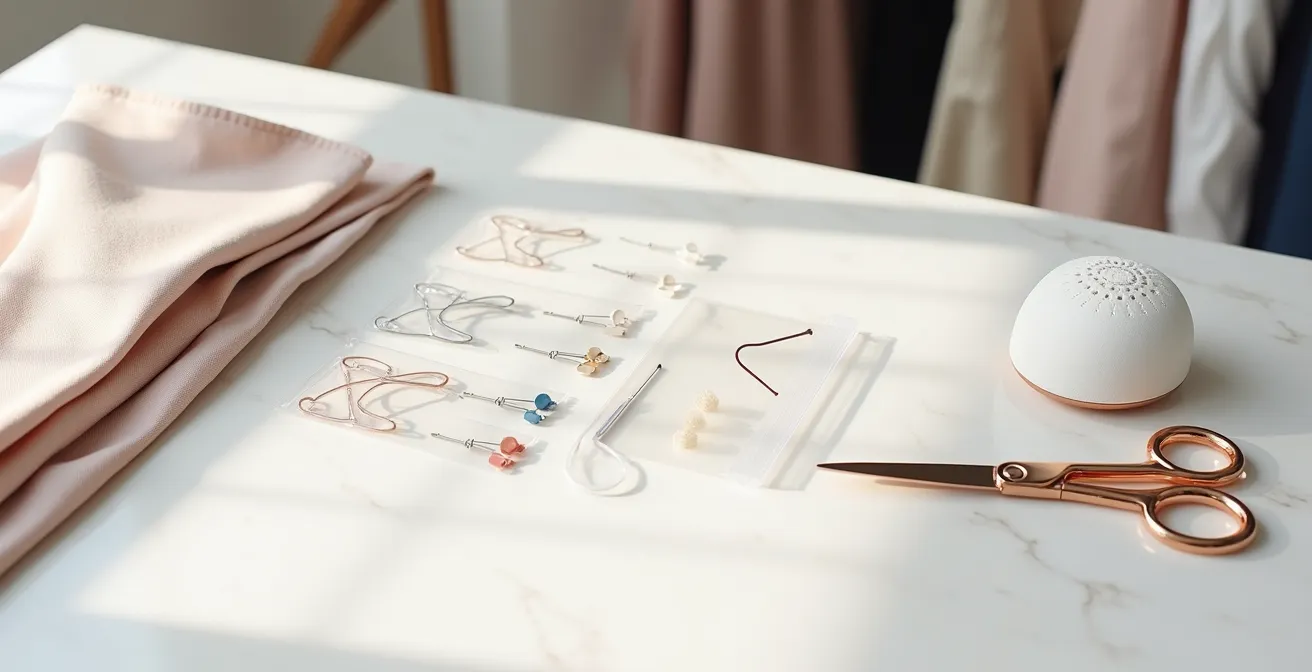
Every junior stylist starts with the same question: « What do I put in my kit? » The internet offers endless shopping lists: top-stick tape, clamps, a portable steamer, pins. While necessary, this is the wrong question. Focusing on a static list of items is the number one mistake that keeps assistants in the assistant loop. You end up with a heavy box of « stuff » but no real strategy. The pros, the ones who get called for major campaigns and build lasting relationships with PR showrooms, know the secret. Your kit isn’t a toolbox; it’s your professional reputation made tangible. It’s an intelligent, living system of solutions.
The real value isn’t in having a thousand different pins. It’s in having the one specific type of pin that saves a delicate couture garment. It’s not just about having a steamer; it’s about having pH-neutral tissue paper to protect a silk dress from water spots during steaming. This is the level of foresight that separates the amateurs from the professionals. This guide isn’t another shopping list. It’s a strategic blueprint for building a kit that solves problems before they arise, proves your value when you have no portfolio, and gives you the confidence to handle any on-set disaster with the calm authority of a seasoned veteran.
This article will deconstruct the strategic thinking behind a high-level styling kit. We will explore how to build credibility with PR agencies from day one, manage the inherent risks of working with priceless samples, and organize your workflow for maximum efficiency on a chaotic location shoot. Prepare to transform your kit from a reactive toolbox into a proactive system for career advancement.
Summary: The Professional Stylist’s Strategic Kit
- How to Pull Clothes from PR Agencies Without a Portfolio?
- The Risk of Damaging Loaned Samples and How to Handle It
- Why Assisting Big Names Is the Only Shortcut to Your Own Editorials?
- Editorial vs Commercial: What Is the Difference in Styling Approach?
- How to Organize a Rail for Quick Changes During a Location Shoot?
- How to Direct a Photoshoot to Get the Campaign Images You Need?
- How to Decode Runway Themes for Daily Wear?
- How to Build a Mood Board That Actually Translates into Product?
How to Pull Clothes from PR Agencies Without a Portfolio?
The classic catch-22 for any new stylist is needing a portfolio to pull clothes, but needing to pull clothes to build a portfolio. The way out isn’t to wait for permission; it’s to manufacture your own credibility. PR agencies are gatekeepers, but their primary concern isn’t your past work—it’s risk mitigation. They need to know their valuable samples are safe with you. You prove this not with tear sheets you don’t have, but with a highly professional « credibility kit » of intangible assets.
This means showing up with your homework done. A polished, well-researched pull letter that demonstrates you understand their brands and sample care protocols is more impressive than a blurry photo from a student project. Speculative mood boards for dream clients or publications show your creative vision and trend analysis skills. As celebrity stylist Lindsay Albanese demonstrated throughout her 17-year career, building a reputation for meticulous preparedness and reliability is the ultimate currency. She earned trust by showing she could anticipate and solve problems, making her a safer bet than stylists with bigger books but less professional rigor.
Your social media, your one-sheet PDF, and the way you communicate all become part of this system. They are tools in your kit that build a narrative of professionalism. Before you ever ask for a single garment, you must present a complete picture of a stylist who is organized, respectful, and strategically-minded. This preemptive professionalism is what opens showroom doors.
Your Action Plan: Build Your Credibility Kit
- Create Speculative Mood Boards: Develop 3-5 detailed mood boards for dream clients using tools like Milanote or Canva, showcasing your unique aesthetic and trend forecasting abilities.
- Develop a Professional One-Sheet: Design a single PDF that clearly outlines your styling philosophy, your step-by-step process, and, crucially, your disaster-prevention methods.
- Execute Test Shoots: Collaborate with emerging photographers and local designers to generate a small but high-quality set of initial professional images.
- Curate Your Digital Footprint: Ensure your social media feed is a professional portfolio, showcasing behind-the-scenes organization, your styling process, and the state of your kit.
- Draft a Polished Pull Letter Template: Create a flawless template that demonstrates you understand PR protocols, sample care, and the importance of timely returns.
The Risk of Damaging Loaned Samples and How to Handle It
The moment you accept a loaned sample, you accept a significant professional and financial responsibility. It’s a risk that is ever-present, and how you prepare for and handle it defines you as a stylist. The reality is, accidents happen. A zipper breaks, a makeup smudge appears, a delicate fabric snags. In fact, industry surveys reveal that nearly 85% of fashion stylists report at least one sample damage incident annually. The difference between a career-damaging incident and a professionally handled situation lies entirely in a structured protocol I call « damage triage. » It’s about prevention, immediate response, and graceful communication.
Prevention starts the moment a sample enters your possession. You must document its initial condition with time-stamped photos and detailed notes, creating a baseline. Your kit should contain a dedicated « damage response » module with specialized tools far beyond a simple sewing kit: pH-neutral tissue paper for steaming delicates, silk-specific stain removers, leather repair tools, and beading needles. This isn’t just about fixing things; it’s about showing you respect the garment enough to have the right tools on hand.
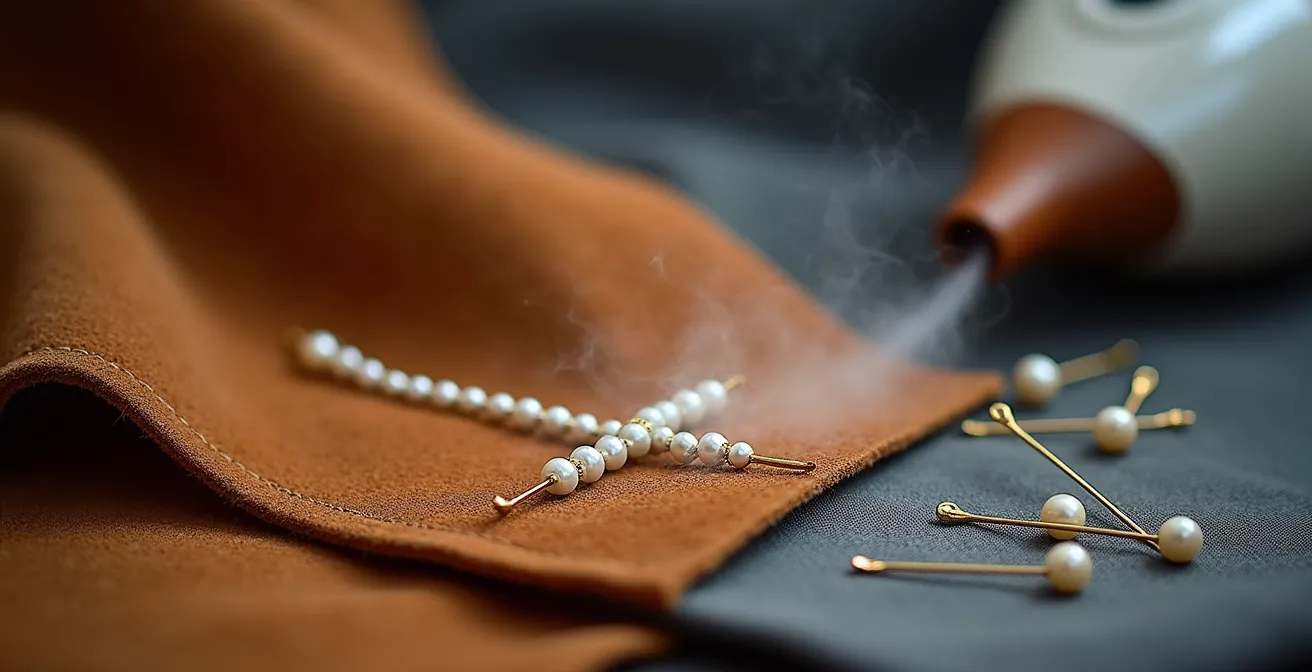
As the image above illustrates, these are not hobbyist tools; they are instruments of professional care. If an incident does occur, your response must be immediate and transparent. Having pre-drafted, empathetic communication templates allows you to inform the PR agency quickly and professionally, outlining the situation and your proposed solution. This structured approach proves your competence and, critically, reduces liability disputes. It transforms a potential disaster into a moment where you can demonstrate your ultimate professionalism.
Why Assisting Big Names Is the Only Shortcut to Your Own Editorials?
In this industry, « who you know » is often a direct result of « what you’ve proven. » Assisting an established, high-level stylist is not just about learning the ropes; it’s the single most effective accelerator for your own career. It’s a real-time audition in a high-stakes environment. On these sets, you are surrounded by the magazine editors, photographers, and creative directors you want to hire you one day. Your performance as an assistant is your calling card, and your styling kit is your primary tool for demonstrating value.
The goal is to move from being a pair of hands to being an indispensable partner. This happens when you engage in anticipatory preparedness. The lead stylist is focused on the big picture; your job is to handle the details they haven’t even thought of yet. This is where your kit shines. It should contain solutions to problems the lead stylist doesn’t know they have.
Case Study: Mark E. Menzie’s Armani Shoot Transformation
On an Armani photo shoot, stylist Mark E. Menzie, then an assistant, was given a seemingly impossible task: completely alter a pair of straight-leg pants into a skinny fit using only pins. Because he had the right tools and a problem-solving mindset, he successfully executed the alteration on the spot. This moment of high-pressure competence was a defining milestone, proving his value far beyond a simple assistant role and helping him transition to leading his own productions.
This story perfectly illustrates the point. A great assistant doesn’t just bring a kit; they bring solutions. As Menzie himself notes, it’s about being ready for both disasters and opportunities. His advice is a core tenet for any aspiring stylist:
Being prepared for pleasant surprises while on set is what separates a good assistant from a future lead stylist. Your kit is your proof of readiness.
– Mark E. Menzie, LinkedIn Article on Creating a Stylist Tool Kit
Editorial vs Commercial: What Is the Difference in Styling Approach?
Not all styling jobs are created equal, and a one-size-fits-all kit is a sign of an inexperienced stylist. The demands of a creatively-driven editorial shoot are vastly different from those of a brand-focused commercial campaign. The professional stylist understands this distinction and employs a strategy of kit modularity. Your core kit—the foundation of clamps, tapes, and steamers—remains the same, but you build out specialized modules for each type of job.
For an editorial shoot, the goal is to tell a story and create a fantasy. Your kit module should be packed with tools for creative deconstruction and alteration. This includes things like fishing line for creating levitation effects, colored gels to interact with light, experimental adhesives for temporary embellishments, and even deconstruction tools like grommet setters or fabric burners. The editorial kit is about enabling creative chaos and pushing boundaries. It’s a creative investment.
A commercial shoot, by contrast, is about brand integrity and product perfection. The goal is to sell a product exactly as it is intended to be seen. Your commercial module is less about creativity and more about precision and control. It must include the brand’s guideline book, Pantone swatches for color accuracy, multiple lint rollers, and product-specific cleaners. Every detail must align with the client’s vision. Here, the kit is often a billable item, a professional necessity for executing a specific brief. Demonstrating you understand this difference and have prepared accordingly shows a level of strategic thinking that clients value highly.
How to Organize a Rail for Quick Changes During a Location Shoot?
A location shoot is organized chaos. You’re battling changing light, unpredictable weather, and tight schedules. The one thing you can, and must, control is your wardrobe rail. A disorganized rail is a bottleneck that can derail the entire day. The key is to move beyond simply hanging clothes to implementing a robust organizational system that facilitates speed and eliminates errors, especially during quick changes.
The most effective method is a pre-packaged, look-by-look system. Before you even arrive on location, each complete look—clothing, shoes, accessories, and underpinnings—should be packed into its own labeled, transparent garment bag. This « Look-in-a-Bag » approach means you can grab an entire outfit in seconds without scrambling for a missing earring or the correct pair of shoes. The labels should correspond directly to the shot list and the call sheet, creating a seamless workflow that everyone on the team can understand.

As the image shows, the process is about precision and care. But the system goes further. A « Post-Look Quarantine » zone—a separate, smaller rail—is essential. Once a look is shot, it goes directly to this rail for immediate assessment, steaming, and prepping for return. This prevents worn items from getting mixed with fresh ones and ensures the pack-up is as organized as the setup. In high-volume environments, like the one described in the PhotoRobot case study, this system can reduce changing time by as much as 60% and ensures a perfect inventory at the end of a long day.
How to Direct a Photoshoot to Get the Campaign Images You Need?
While the photographer technically directs the shoot, the stylist is the director of the garment. Your role is not passive; you are responsible for ensuring the clothes look their absolute best in every single frame to meet the campaign’s objectives. This requires proactive direction, constant vigilance, and a kit that functions as a creative enabler. To get the campaign images you need, you must maintain visual continuity and be ready to pivot creatively at a moment’s notice.
A « Continuity Kit » is essential for this. The most crucial tool is a simple Polaroid camera. Taking a quick snapshot of each setup creates a physical continuity board on set. This tangible reference is invaluable for tracking details like how a sleeve is rolled, how a collar is popped, or how a shirt is tucked across multiple shots and setups. It’s the only way to guarantee consistency when shooting out of sequence.
Beyond continuity, your kit allows you to collaborate creatively with the photographer and director. When a spontaneous idea strikes— »let’s drench the shirt! » or « can we make the fabric fly? »—you need to be able to say yes. Having multiple identical basics (like white shirts) for potential drenching, spray bottles for creating wet looks, and fishing line for controlling fabric movement is what turns your kit from a repair station into a creative arsenal.
The styling kit becomes a creative enabler when you can say ‘yes’ to a director’s spontaneous idea because you have spray bottles, extra garments, and deconstruction tools ready.
– Fashion Photography Team, PhotoRobot Fashion Photography Tutorial
How to Decode Runway Themes for Daily Wear?
A stylist’s job often involves acting as a translator, decoding the high-concept, avant-garde themes of the runway and making them accessible and desirable for daily wear, commercial clients, or personal styling. This is not about creating exact replicas; it’s about capturing the *essence* of a trend—its silhouette, color, texture, and attitude. Your styling kit is your laboratory for this process of deconstruction and reinterpretation.
The first step is building a reference library within your kit. This includes a texture library with swatches of runway-trending materials (like liquid metal fabrics, sheer organza, or modern neo-tweeds). Feeling the material is as important as seeing it. Alongside this, your kit should contain tools for temporary transformation. Specialized fashion tapes, non-destructive clips, and clever folding techniques allow you to mimic a runway silhouette on a basic garment without permanently altering it. This is how you test and prove a concept to a client.
The process is one of creative analysis, as seen in the workspace above. You break down a trend into its core components. For example, a « draped » trend might be translated using your kit’s tools to create an asymmetrical fold on a simple blazer. You document these transformations with before-and-after photos, building a unique portfolio that showcases your ability to not just spot trends, but to make them wearable and commercially viable. Your kit, with its deconstruction tools and texture library, becomes the physical bridge between high-fashion inspiration and real-world application.
Key Takeaways
- Your kit’s primary function is not storage, but as a system for proactive problem-solving and demonstrating professionalism.
- Intangible assets like polished pull letters and speculative mood boards are more powerful for securing loans than a non-existent portfolio.
- Differentiating your kit with modular add-ons for editorial versus commercial work showcases strategic depth that clients value.
How to Build a Mood Board That Actually Translates into Product?
The mood board is the foundational document of any shoot, but too often it’s a collection of beautiful, disconnected images that fail to translate into a cohesive final product. The gap between the visual promise of the mood board and the reality on set is where many projects fall apart. In fact, research from Fashion Mentor’s industry analysis reveals that 78% of styling projects fail to match the initial vision when the stylist’s kit lacks the corresponding physical tools and materials. The solution is to create a mood board that is not just visual, but tangible.
This is achieved through a « haptic » or tactile mood board methodology. For every keyword or inspirational image on your board— »glossy, » « rigid, » « ethereal »—you must have a corresponding tool or material from your kit ready to execute it. If your board features images of structured, high-gloss fashion, your kit must contain fabric stiffening spray, wire boning, or high-gloss finishing sprays. This grounds the abstract concept in physical reality.
Case Study: The Haptic Mood Board Method
Photographer Rachel Kimberley developed a ‘haptic’ mood board system that directly links inspiration to execution. For a shoot requiring ‘glossy and rigid’ aesthetics, she didn’t just show images; she assembled a specific tray of tools from her kit, including fabric stiffening spray and high-gloss finishing sprays. This tangible approach ensured the entire team understood the textural goal, leading to a 95% client approval rate on the first presentation because the physical result perfectly matched the visual promise. Her method includes using a portable cork board on set for ‘live mood boards’ with Polaroids, keeping the execution tightly aligned with the original vision.
By pairing printed images with actual fabric swatches, material samples, and the specific tools needed to create the desired effect, you create an undeniable link between vision and execution. This method forces a practical check on your creative ideas and ensures that when you present a mood board, you’re not just presenting a dream; you’re presenting a concrete, achievable plan. It’s the ultimate proof that you are a stylist who can deliver on your promises.
Ultimately, a styling kit is the physical manifestation of your experience and foresight. It’s a system built not from a generic list, but from the memory of every past on-set challenge and the anticipation of every future one. To elevate your career, stop collecting items and start building a system of solutions.