The reason your hair is stuck at shoulder-length isn’t breakage—it’s a health crisis happening at the root.
- Chronic, low-grade inflammation from conditions like seborrheic dermatitis is silently choking hair follicles, preventing them from completing a healthy growth cycle.
- An imbalanced scalp microbiome, poor cleansing habits, and harsh chemical services disrupt the delicate follicular environment required for sustained growth.
Recommendation: Shift your focus from temporarily mending ends to permanently healing your scalp. Diagnosing your specific scalp condition is the first and most critical step to unlocking your hair’s true length potential.
You meticulously care for your hair. You use deep conditioners, avoid heat, and get regular trims, yet your hair stubbornly refuses to grow past your shoulders. The common advice is to focus on split ends and breakage, treating the hair shaft as the primary culprit. But what if this entire approach is fundamentally flawed? What if the problem isn’t at the ends of your hair, but at the very beginning? As a trichologist, I see countless clients fixated on the dead keratin they can see, while completely ignoring the living, breathing ecosystem where growth is born: the scalp.
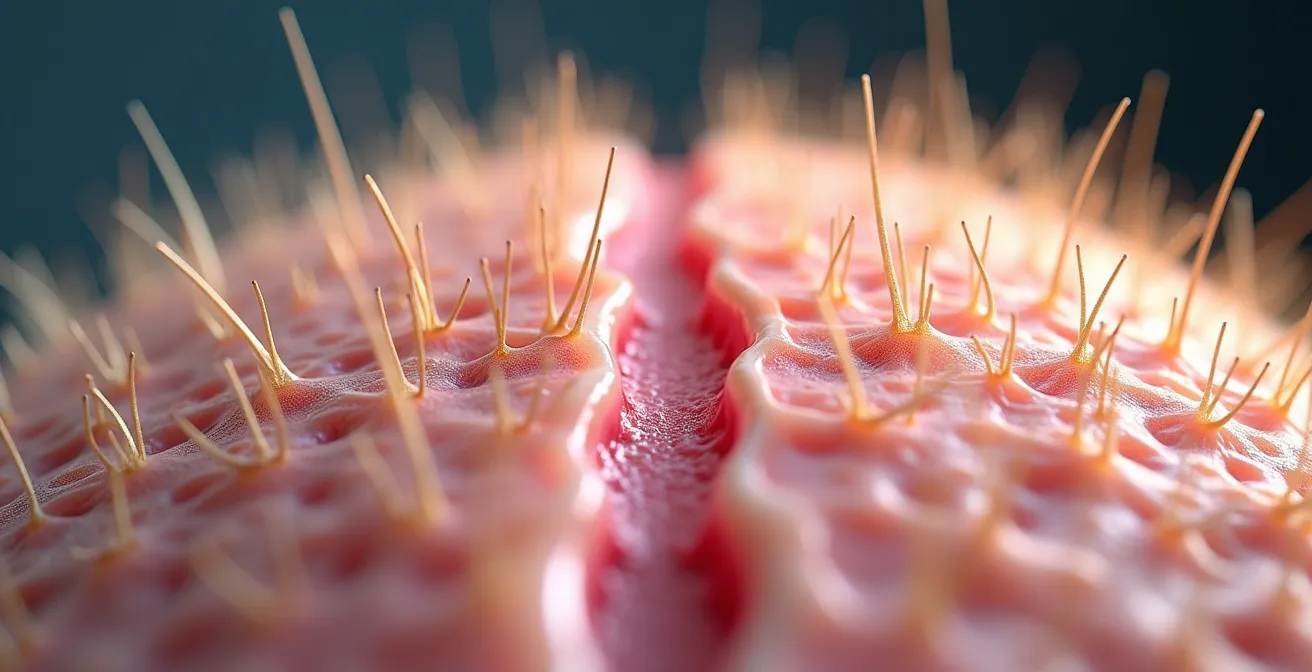
The persistent frustration of reaching a growth plateau is rarely a « terminal length » issue. More often, it’s a symptom of a deeper imbalance within the follicular environment. We’re not just talking about dandruff; we’re talking about a spectrum of issues from microbial overgrowth and hormonal sensitivity to chronic inflammation—a state I refer to as « inflammaging. » This low-grade, persistent inflammation silently damages follicles, shortens the anagen (growth) phase, and ultimately sabotages your efforts to gain length. The split ends and mid-shaft breakage you see are merely the last, most visible signs of a crisis that started at the root.
This guide will shift your perspective from the ends to the source. We will deconstruct the complex relationship between scalp health and hair growth, moving beyond superficial fixes. We will explore how to correctly diagnose your scalp’s condition, debunk myths about washing, compare stimulation techniques, and understand the true impact of chemical services. By focusing on creating a healthy, balanced scalp, you can finally address the root cause of your growth plateau and unlock your hair’s true potential.
To navigate this complex topic, we’ve broken it down into a clear, step-by-step exploration of your scalp’s ecosystem. This article will guide you through identifying underlying conditions, adopting correct care protocols, and understanding the risks of common salon services, all from a trichologist’s root-cause perspective.
Summary: Why Your Hair Won’t Grow Past Your Shoulders? A Trichologist Explains the Scalp-First Solution
- The Risk of Ignoring Seborrheic Dermatitis and Hair Thinning
- How to Exfoliate Your Scalp Without Tangling Your Hair?
- Dandruff vs Dry Scalp: How to Tell the Difference?
- Over-washing vs Under-washing: What Actually Causes Oily Scalp?
- Massage or Microneedling: Which Stimulates Scalp Blood Flow Better?
- The Risk of Bleaching Over Permed Hair: A Chemical Haircut Waiting to Happen
- How to Double Cleanse Without Stripping Your Skin Barrier?
- Box Dye vs Salon Color: Why Correction Costs $300 More?
The Risk of Ignoring Seborrheic Dermatitis and Hair Thinning
One of the most significant yet often misdiagnosed barriers to hair growth is seborrheic dermatitis. Many dismiss it as stubborn dandruff, but it is a chronic inflammatory condition of the scalp. The primary driver is an overgrowth of a naturally occurring yeast called Malassezia. When the scalp’s microbiome is out of balance, this yeast proliferates, feeding on sebum and producing oleic acid. This byproduct triggers an inflammatory response, leading to the characteristic itching, scaling, and redness. This inflammation is not just uncomfortable; it is actively hostile to hair growth.
The link between this condition and hair thinning is direct and well-documented. Research shows a stark contrast in yeast populations, with studies indicating significantly higher Malassezia colonization in individuals experiencing hair shedding compared to those without. The chronic inflammation constricts blood vessels around the follicle, reducing the flow of oxygen and nutrients. This suffocates the hair root, shortens the anagen (growth) phase, and can eventually lead to follicle miniaturization and visible thinning, a condition known as telogen effluvium. Ignoring it means allowing this inflammatory cycle to progressively weaken your hair’s foundation.
Fortunately, addressing seborrheic dermatitis can reverse its impact on hair growth if caught early. A targeted treatment plan focuses on controlling the Malassezia population and reducing inflammation, allowing follicles to recover. A typical recovery timeline involves:
- Week 1-3: Begin treatment with an antifungal shampoo (containing ingredients like ketoconazole or pyrithione zinc) to control the Malassezia overgrowth.
- Week 3-4: Notice a significant reduction in shedding as the scalp inflammation subsides.
- Month 2-3: Observe the first signs of new hair growth emerging from previously inflamed and dormant follicles.
- Month 3-6: See visible improvement in hair density and thickness as the recovered follicles return to a healthy growth cycle.
Treating seborrheic dermatitis is not about a quick fix but about long-term management of your scalp’s ecosystem. Consistent treatment restores balance, halts the inflammatory damage, and creates the healthy foundation necessary for your hair to finally grow past its plateau.
How to Exfoliate Your Scalp Without Tangling Your Hair?
Once inflammation is under control, the next step in revitalizing the follicular environment is proper exfoliation. Dead skin cells, excess sebum, and product buildup can form a layer that smothers follicles, impeding growth and dulling hair. However, many people with longer or textured hair avoid scalp exfoliation for a valid reason: aggressive physical scrubs can cause massive tangles and mechanical breakage, defeating the purpose. The key is to use a chemical exfoliant and a precise application technique that treats the scalp without disturbing the hair shaft.
The most effective method is to work in sections on dry hair *before* you get in the shower. This allows the product to be applied directly to the skin and work without being diluted by water. Use a product with a nozzle tip for precision control.
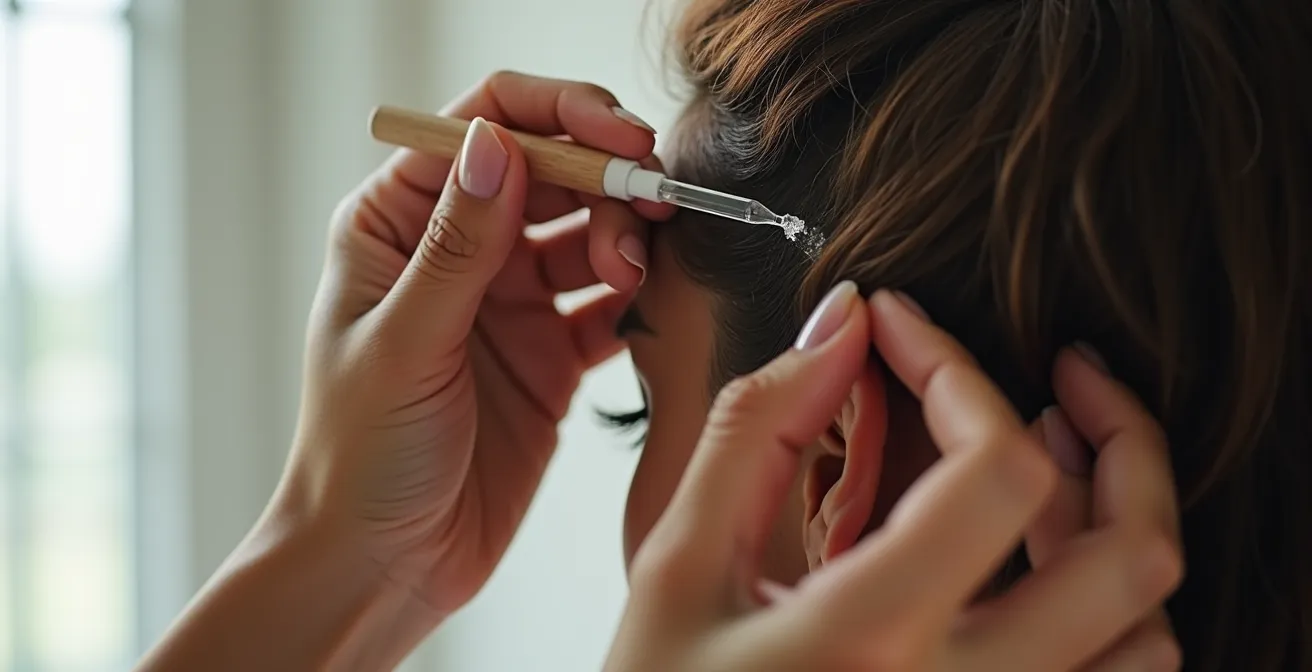
As shown in the technique above, parting the hair and applying the treatment along the scalp line ensures targeted delivery. This method minimizes contact with the lengths of the hair, preventing the friction that leads to tangles. Gently massage the product into the scalp with your fingertips (not nails) to help lift debris, then let it sit for the recommended time before proceeding with your wash routine.
Choosing the right type of exfoliant is just as critical as the application method. Not all scalps are the same, and what works for an oily scalp can be too harsh for a sensitive one. A comparative analysis of exfoliating acids reveals clear differences in their function and suitability.
| Exfoliant Type | Best For | Key Benefits | Application Method |
|---|---|---|---|
| PHAs (Gluconolactone) | Sensitive scalps | Gentle exfoliation, hydrating | Apply to dry scalp before washing |
| Fruit Enzymes (Papain, Bromelain) | Tangle-prone hair | Dissolves dead cells without friction | Leave on for 5-10 minutes |
| Salicylic Acid (BHA) | Oily, acne-prone scalps | Deep pore cleansing | Massage into sectioned scalp |
For most people struggling with growth plateaus, a gentle PHA or enzyme-based exfoliant used once a week is a transformative step. It creates a clean, balanced canvas, enhancing the absorption of other treatments and allowing follicles to function without obstruction.
Dandruff vs Dry Scalp: How to Tell the Difference?
Effective treatment begins with an accurate diagnosis. Many people who believe they have dandruff are actually suffering from a dry scalp, and vice versa. Using an anti-dandruff shampoo on a dry scalp will only exacerbate the problem by stripping it of necessary lipids, while using hydrating products on a scalp with true dandruff (seborrheic dermatitis) will feed the yeast causing the issue. Distinguishing between the two is the most critical first step in restoring scalp health, and it comes down to one key factor: sebum (oil) production.
True dandruff, linked to Malassezia overgrowth, occurs on an oily scalp. The flakes are typically larger, yellowish, and feel greasy or waxy. A dry scalp, on the other hand, lacks sufficient oil. The flakes are small, white, and powdery, and the scalp often feels tight and itchy, especially after washing. While looking at the flakes is a good indicator, environmental factors and product use can be misleading. For a definitive answer, a simple at-home test can provide clarity.
This protocol helps you assess your scalp’s baseline sebum production, giving you a clear indicator of whether your issue is oil-related (dandruff) or moisture-related (dryness). Following these steps precisely is crucial for an accurate reading.
Your Action Plan: The 24-Hour Scalp Blotting Test
- Wash: Start by washing your hair with a gentle, sulfate-free shampoo to create a neutral baseline.
- Dry & Wait: Allow your hair to air dry completely. Do not apply any leave-in conditioners, serums, or styling products to the root area.
- Incubate: Wait exactly 24 hours. During this time, avoid touching your scalp, wearing hats, or excessive sweating to ensure an accurate reading of natural sebum production.
- Blot: After 24 hours, take a clean oil blotting paper (the kind used for facial skincare) and press it firmly against several different areas of your scalp, such as the crown, hairline, and nape.
- Analyze: Examine the paper. If it has a clear, oily residue, your scalp is overproducing sebum, and your flaking is likely true dandruff. If the paper comes away clean and dry, your scalp is lacking lipids, indicating a dry scalp condition.
Once you have this information, your path forward becomes clear. An oily result points you toward treatments that control sebum and Malassezia (like salicylic acid or ketoconazole). A dry result directs you to hydrating, soothing ingredients that replenish the lipid barrier (like hyaluronic acid, squalane, or ceramides). Treating the right problem is the only way to break the cycle and build a foundation for growth.
Over-washing vs Under-washing: What Actually Causes Oily Scalp?
The debate around washing frequency is filled with misinformation, particularly the persistent myth that shampooing too often « strips » the scalp, causing it to « panic » and produce even more oil. This leads many people with oily scalps to under-wash in an attempt to « train » their sebaceous glands, inadvertently worsening the very problem they’re trying to solve. From a trichological standpoint, this theory is incorrect. The scalp does not operate on a panic-based feedback loop.
The primary driver of excess sebum production is not external cleansing habits but internal hormonal sensitivity. As a specialist from K Bella Hair Studio explains in a consultation, the core issue is often genetic.
Sebaceous glands do not ‘panic’ and overproduce oil because they are stripped. The primary cause is often genetic sensitivity of the glands to hormones like androgens (DHT).
– Trichologist consultation, K Bella Hair Studio specialist interview
Dihydrotestosterone (DHT) is a potent androgen that binds to receptors in the sebaceous glands, signaling them to produce more oil. Individuals with oily scalps simply have glands that are more sensitive to these hormonal messages. Under-washing allows this excess, DHT-rich sebum to accumulate, along with sweat, dead skin cells, and environmental pollutants. This creates the perfect breeding ground for bacteria and Malassezia yeast, leading to the inflammation and follicular blockage that stifles hair growth. Over-washing with harsh, stripping sulfates can cause dryness and irritation, but it does not trigger more oil production.
The solution for an oily scalp is not to wash less, but to wash as often as needed (even daily) with the *right* kind of shampoo. A gentle, sulfate-free cleanser formulated with ingredients that regulate sebum (like salicylic acid or zinc PCA) will effectively remove the harmful buildup without causing irritation. This keeps the follicular environment clean, balanced, and optimized for healthy hair growth.
Massage or Microneedling: Which Stimulates Scalp Blood Flow Better?
A clean, balanced scalp is the foundation, but for optimal growth, follicles need a steady supply of nutrients and oxygen delivered via the bloodstream. This is where scalp stimulation comes in, a practice aimed at enhancing vascular perfusion at the root. The two most common methods are manual massage and microneedling. While both have benefits, they operate on different levels of intensity and are suited for different goals: maintenance versus therapeutic intervention.
Scalp massage is a gentle, non-invasive technique that provides a temporary boost in surface-level blood flow. Using the pads of your fingers to perform firm, circular motions for several minutes a day can help relieve tension, reduce stress hormones like cortisol (which can negatively impact the hair cycle), and provide a mild circulatory benefit. It is an excellent daily practice for general scalp wellness and can make the scalp feel more pliable and healthy. It is best viewed as a supportive, maintenance-level habit.
Microneedling, on the other hand, is a clinical, therapeutic treatment. It involves using a device with fine needles (typically 0.5mm to 1.5mm for scalp treatment) to create microscopic punctures in the skin. This controlled micro-injury triggers the body’s natural wound-healing response, which involves a cascade of growth factors and the formation of new blood vessels (angiogenesis). This dramatically increases blood supply to the follicles. Furthermore, as explained in professional protocols, the technique creates micro-channels that significantly enhance the absorption and efficacy of topical treatments like minoxidil or peptide serums, driving active ingredients directly to the follicle.
In summary, think of scalp massage as daily exercise for your scalp—beneficial for maintenance and overall health. Think of microneedling (performed correctly and hygienically, ideally by a professional) as a targeted therapeutic intervention designed to actively regenerate the follicular environment and powerfully boost the effects of other growth treatments. For someone serious about overcoming a growth plateau, incorporating periodic microneedling can provide a level of stimulation that massage alone cannot achieve.
The Risk of Bleaching Over Permed Hair: A Chemical Haircut Waiting to Happen
While internal scalp health is paramount, external chemical aggressors can deliver a swift and devastating blow to both the hair shaft and the follicular environment. Perhaps the most dangerous combination is applying bleach (a high-pH, oxidative process) over hair that has already been structurally compromised by a perm (a process that breaks and reforms disulfide bonds). This double assault is what stylists grimly refer to as a « chemical haircut, » and the damage extends far beyond simple breakage.
A perm chemically breaks down the hair’s internal disulfide bonds to reshape it. Bleach then forces the cuticle open and oxidizes the melanin inside. Performing these two intense services on the same hair, especially without adequate time for recovery, obliterates the hair’s structural integrity, leaving it gummy, weak, and prone to snapping off. More critically, the harsh chemicals inevitably make contact with the scalp, causing severe irritation, chemical burns, and intense inflammation. This acute trauma sends a shockwave through the follicular ecosystem.
This intense stress on the scalp can trigger a massive, delayed shedding event known as telogen effluvium. As dermatology specialists at UCF Health warn, the inflammation from such harsh services can cause a large number of follicles to prematurely shift from the growing (anagen) phase to the shedding (telogen) phase. The terrifying part for the client is the delay; the hair doesn’t fall out immediately. Instead, the massive hair shedding typically occurs 2-3 months after the salon visit, causing sudden and alarming hair loss that many don’t connect back to the chemical service.
This scenario underscores the fragility of the hair and scalp system. Achieving length is not just about promoting growth but also about preserving the hair you have. Avoiding high-risk, overlapping chemical processes is a non-negotiable rule for anyone whose primary goal is long, healthy hair. The short-term aesthetic is never worth the long-term risk of a chemical haircut and a traumatized scalp.
How to Double Cleanse Without Stripping Your Skin Barrier?
For those dealing with product buildup, silicones, or an oily scalp, a single pass with a gentle shampoo often isn’t enough to properly clean the follicular environment. This is where the practice of double cleansing—a technique borrowed from skincare—becomes invaluable. The goal is not to « strip » the scalp, but to use two different types of cleansers to dissolve two different types of impurities, ensuring a truly clean canvas without compromising the skin’s delicate barrier.
The logic is simple: oil dissolves oil. The first cleanse uses a lightweight oil to break down and lift stubborn, oil-based debris like sebum, silicones from styling products, and pollutants. The second cleanse uses a traditional water-based, targeted shampoo to wash away the oil residue and treat the scalp’s specific needs (e.g., hydration, anti-inflammatory). This two-step process ensures a much deeper clean than one shampoo alone, as the second wash can actually reach the scalp skin now that the layer of buildup has been removed. This enhances the efficacy of any treatment ingredients in your shampoo.
Executing this method correctly is key to avoiding irritation and achieving the desired result. The process should be methodical and gentle:
- Oil Cleanse on Dry Scalp: Before getting in the shower, apply a lightweight oil (like squalane for oily scalps or jojoba for dry ones) directly to your dry scalp, section by section.
- Massage: Gently massage the oil into your scalp for 2-3 minutes. This action helps to mechanically loosen and dissolve sebum plugs and product buildup.
- Emulsify: Add a small amount of warm water to your scalp and continue massaging. The oil will turn into a milky, thin emulsion that is easy to rinse.
- First Rinse: Rinse thoroughly with warm water until all oily residue is gone.
- Second Cleanse: Apply your targeted shampoo (e.g., a medicated shampoo for dandruff or a hydrating one for dryness). Because the barrier of buildup is gone, you’ll find it lathers much more effectively.
- Final Rinse: Finish with a final rinse, preferably with cool water to help seal the hair cuticle and enhance shine.
By adopting a double cleansing routine once or twice a week, you ensure that your scalp is not just surface-clean, but truly purified. This allows your follicles to breathe, maximizes the benefits of your treatment products, and eliminates the buildup that contributes to the inflammatory cycle holding your hair growth back.
Key takeaways
- Your hair’s ability to grow long is dictated by the health of your scalp, not the condition of your ends.
- Chronic inflammation, often from misdiagnosed conditions like seborrheic dermatitis, is the primary inhibitor of the hair growth cycle.
- Accurate diagnosis is crucial before treatment; you must determine if you have a truly oily scalp (dandruff) or a lipid-deficient dry scalp.
Box Dye vs Salon Color: Why Correction Costs $300 More?
The allure of a $10 box of hair dye is strong, but from a trichological perspective, the potential cost to your scalp and hair health is astronomical. The reason professional color correction services are so expensive is that they are not just fixing a color; they are performing triage on hair and scalp that have been subjected to harsh, untailored chemicals. In fact, stylists often report that a color correction typically costs $300 or more, a direct consequence of the damage caused by one-size-fits-all formulations.
Box dyes are formulated to work on the widest possible range of hair types, which means they often contain high concentrations of ammonia and a high-volume developer to ensure the color « takes. » This aggressive formulation is applied indiscriminately from root to tip, saturating the scalp. This direct, prolonged contact with harsh chemicals is a primary cause of contact dermatitis, chemical burns, and severe scalp inflammation—all of which disrupt the hair growth cycle. A professional colorist, by contrast, is trained to protect the scalp.
The difference in application and formulation has a profound impact on the health of the follicular environment. A professional service is a tailored chemical process designed to minimize scalp trauma, whereas a box dye is a blunt instrument. A detailed comparison of scalp impact highlights these critical distinctions.
| Factor | Box Dye | Professional Color |
|---|---|---|
| Application method | Full saturation, direct scalp contact | Precise off-scalp application, barrier creams |
| Developer strength | One-size-fits-all, often harsh | Customized to hair needs |
| Scalp protection | Minimal to none | Professional barrier products used |
| Risk of contact dermatitis | Higher due to PPD, ammonia concentration | Lower with gentler formulations |
Ultimately, choosing professional color is an investment in your scalp’s long-term health. By preventing the chemical trauma that leads to inflammation and follicular stress, you are actively protecting your hair’s growth potential. That $300 correction fee isn’t just for color—it’s the price of trying to undo the damage to the very foundation of your hair.