
The secret to understanding your breakouts isn’t in a mystical organ chart, but in learning to perform a systematic diagnostic process on your own skin.
- True face mapping involves analyzing skin condition (dry vs. dehydrated) and lesion type (fungal vs. bacterial) zone by zone.
- Your unique skin type and pore structure are determined by genetics, but their appearance is amplified by lifestyle factors you can control.
Recommendation: Use the « Wash Test » to establish your skin’s baseline type, then apply targeted solutions only where needed, avoiding blanket treatments that lead to barrier damage.
If you’re struggling with recurring breakouts in the same spots—the persistent chin acne, the sudden forehead bumps—you’ve likely encountered a face map. These colorful charts promise a simple answer: forehead acne is from your digestive system, cheek breakouts are from your phone, and chin spots are purely hormonal. While there’s a kernel of truth in connecting lifestyle to skin health, this oversimplified approach often misses the point entirely. It treats the skin as a passive messenger for other organs, rather than the complex, responsive organ it is.
Relying on these generic maps can lead to ineffective, or even damaging, skincare choices. You might adopt a restrictive diet for your « digestion-related » forehead acne when the real culprit is a specific type of fungal breakout triggered by sweat. The true power of face mapping isn’t found in a one-size-fits-all chart, but in learning to become your own skin detective. It’s a process of observation and analysis, a way to read your skin’s own language.
But what if the key wasn’t about linking a spot to a spleen, but about understanding the difference between dryness and dehydration on your cheeks? Or recognizing the distinct itch of fungal acne versus the pain of a bacterial cyst? This is the foundation of a diagnostic approach to face mapping. It empowers you to look at your face not as a pre-drawn map, but as a dynamic landscape with unique zones that have specific needs.
This guide will walk you through that diagnostic process. We will deconstruct common skin issues, teach you simple tests to perform at home, and show you how to interpret the results to build a personalized, effective skincare strategy. You will learn to identify the true causes of your concerns, from barrier damage to the nuances of pore size, and understand the real difference between a DIY analysis and professional expertise.
To navigate this in-depth guide, discover the key areas we will explore. The following summary outlines the diagnostic journey we are about to undertake, moving from identifying specific conditions to understanding the professional framework of skin analysis.
Summary: A Diagnostic Guide to Understanding Your Breakouts
- The Risk of Confusing Fungal Acne with Regular Acne
- Dry vs Dehydrated: How to Diagnose Your Skin’s Thirst?
- How to Perform the « Wash Test » to Find Your True Skin Type?
- Genetics vs Lifestyle: Why You Have Pores Size Issues?
- Why Over-Exfoliation Is the #1 Cause of Barrier Damage?
- When to Switch Your Routine Based on Weather Changes?
- Skin Scanners vs Dermatologist Eye: Which Is More Accurate?
- How to Become a Licensed Esthetician: The Reality of the Training?
The Risk of Confusing Fungal Acne with Regular Acne
One of the most common diagnostic errors in self-mapping is mistaking fungal acne (Malassezia folliculitis) for traditional bacterial acne. Treating one with products designed for the other will not only be ineffective but can often make the condition worse. The key to differentiation lies not in the location, but in the morphology and sensation of the breakouts. It requires a more detailed observation than simply noting a breakout on your forehead.
According to Licensed Esthetician Graceanne Svendsen, a critical diagnostic clue is the appearance and feeling of the bumps. Fungal acne typically presents as uniform, small red bumps, often concentrated on the forehead, hairline, and chest, and is almost always intensely itchy. In contrast, bacterial acne features a variety of lesions—pustules, papules, cysts—that vary in size and are more likely to be tender or painful to the touch. Environmental triggers are also a crucial part of the map; as one analysis on breakout patterns explains, fungal breakouts are strongly correlated with sweat and humidity, which is why they might flare up after a workout or in the summer.
Misdiagnosing this can lead to a frustrating cycle. Using heavy creams or oils, common in some acne routines, can feed the yeast responsible for fungal acne, exacerbating the issue. Conversely, applying anti-fungal treatments to bacterial acne will have little to no effect. Learning to distinguish between the two is a fundamental first step in accurate face mapping.
Your Action Plan: The Itch vs. Pain Diagnostic Test
- Observe the Pattern: Look closely at the breakouts. Are they uniform, tiny bumps (likely fungal) or varied in size and inflammation (likely bacterial)?
- Perform the Sensory Test: Pay attention to the feeling. Is the primary sensation an intense itch (fungal), or is it tenderness and pain (bacterial)?
- Track Environmental Correlations: Note if breakouts worsen after sweating, in humid weather, or when using thick, occlusive products. This points towards a fungal component.
- Document Product Reactions: If traditional acne treatments (like benzoyl peroxide) fail and the itching persists, it’s a strong indicator of fungal acne.
- Confirm with a Professional: If you suspect fungal acne, a dermatologist can perform testing to confirm and prescribe the appropriate anti-fungal treatment plan.
Dry vs Dehydrated: How to Diagnose Your Skin’s Thirst?
Another crucial diagnostic crossroads in face mapping is distinguishing between dry skin and dehydrated skin. The terms are often used interchangeably, but they represent entirely different issues that require different solutions. Getting this wrong means applying the wrong products to the wrong zones, leading to continued discomfort and breakouts. Dry skin is a type, characterized by an insufficient production of natural oils (sebum). Dehydrated skin is a condition, characterized by a lack of water, and it can affect any skin type—even oily skin.
A person with dry skin will often experience a consistently tight, rough, and flaky texture across their face. In contrast, dehydrated skin can feel tight and show fine, triangular-shaped lines, yet still produce excess oil as it tries to compensate for the lack of water. This is why you might have an oily T-zone that simultaneously feels tight and looks dull—a classic sign of dehydration, not dryness. Mapping these differences zone by zone is essential for targeted treatment.
This side-by-side comparison helps clarify the diagnostic markers for each zone. For instance, you may have truly dry cheeks that need oil-rich emollients, but a dehydrated forehead that requires water-binding humectants.
| Characteristic | Dry Skin (Type) | Dehydrated Skin (Condition) | Zone-Specific Signs |
|---|---|---|---|
| Texture | Rough, flaking constantly | Dull, fine crinkly lines when making expressions | Cheeks show flakes (dry) vs forehead shows lines (dehydrated) |
| Feel | Constantly tight, lacks oil | Tight but can also be oily | U-zone tightness (dry) vs T-zone oily but tight (dehydrated) |
| Visual Markers | Visible flakes, rough patches | Triangle-shaped fine lines, dull appearance | Persistent patches vs temporary lines with movement |
| Treatment Map | Emollients and oils to seal moisture | Humectants like Hyaluronic Acid to draw water | Apply humectants everywhere, oils only on dry zones |
To perform a quick physical diagnosis, use the « Snap Test. » Gently pinch a small amount of skin on your cheek. If it « tents » up and returns to normal slowly, that zone is dehydrated. If it snaps back quickly but feels rough, it’s likely dry. Mapping the results of this test across your forehead, cheeks, and chin will give you a precise guide for applying serums and moisturizers.
How to Perform the « Wash Test » to Find Your True Skin Type?
Before you can accurately map breakouts or conditions, you must establish your baseline: your true skin type. Products, weather, and daily activities can mask your skin’s natural state. The « Wash Test » is a classic, simple, and effective diagnostic tool for stripping away these variables and revealing the genetic foundation of your skin. Performing this test allows you to create a personalized zone chart, moving beyond generic labels like « combination skin » to a much more nuanced understanding.
The process is straightforward. You will cleanse your face and then wait, observing how your skin behaves without any products. This 30-minute window is crucial. Does your forehead become shiny while your cheeks feel tight? This is your skin’s true language, providing a clear map of where your sebaceous glands are most and least active. This is not about finding a single label but about mapping the different micro-climates on your face.
The goal is to document these specific zonal responses to create a precise guide for product application. An advanced zonal protocol, as detailed in some professional skin analysis guides, moves beyond a single outcome. Here’s how to perform it correctly:
- Cleanse: Start by washing your face with a gentle, pH-balanced cleanser and pat it completely dry. Avoid any harsh or stripping formulas.
- Wait: Do not apply any toners, serums, or moisturizers. Wait for exactly 30 minutes. This allows your skin to return to its natural state.
- Assess Each Zone: Examine your forehead, nose, cheeks, and chin independently. Use a blotting paper if needed to check for sebum. Note any feelings of tightness, comfort, or visible shine.
- Map Your Results: On a piece of paper or in a notebook, draw a simple face outline and mark the characteristics of each zone. For example: « Forehead: shiny, » « Nose: very oily, » « Cheeks: tight, » « Chin: normal. »
This personalized map is now your ultimate guide. It tells you to apply a mattifying serum to your forehead and nose, a richer cream to your cheeks, and a standard moisturizer to your chin. Re-running this test seasonally will help you adapt your routine as your skin’s needs change.
Genetics vs Lifestyle: Why You Have Pores Size Issues?
One of the most common concerns brought to dermatologists and estheticians is pore size. Many people believe their pores are « too big » and seek ways to « shrink » them. However, a crucial part of face mapping is understanding that pore size is primarily determined by genetics. You can’t change the fundamental size of your pores any more than you can change your eye color. What you can influence, however, is their appearance.
Celebrity esthetician Renée Rouleau offers a powerful framework for this, explaining that genetics determines our « base map » of pore distribution. She states, « Genetics determines the ‘base map’ of our pore distribution with naturally larger pores in the oily T-zone. Lifestyle factors then amplify the appearance on that map through sun damage, product congestion, and dehydration. » This insight is transformative. It shifts the goal from the impossible task of « shrinking » pores to the achievable one of « clearing » and « refining » their appearance through targeted lifestyle and skincare choices.
Genetics determines the ‘base map’ of our pore distribution with naturally larger pores in the oily T-zone. Lifestyle factors then amplify the appearance on that map through sun damage, product congestion, and dehydration.
– Renée Rouleau, Celebrity Esthetician
Lifestyle factors act as amplifiers on this genetic map. For instance, a high-glycemic diet can increase sebum production, making the genetically larger pores in your T-zone appear more prominent due to congestion. Sun damage degrades collagen, the support structure around pores, causing them to look slack and enlarged, particularly on the cheeks. A case study highlighted by dermatologist Dr. Rachel Nazarian emphasizes a zone-specific treatment strategy. Instead of one « pore-shrinking » product, the solution is multi-faceted: Beta-Hydroxy Acids (BHAs) like salicylic acid for sebum-congested nose pores, retinoids to build collagen and support cheek pores, and proper hydration to plump the skin and minimize the appearance of fine lines and pores on the forehead.
Why Over-Exfoliation Is the #1 Cause of Barrier Damage?
In the quest for clear, smooth skin, it’s easy to fall into the « actives stacking trap. » Armed with a basic face map, a person might use a salicylic acid toner for blackheads on the nose, a glycolic acid serum for texture on the forehead, and a retinoid for anti-aging on the cheeks. While each choice seems logical in isolation, the cumulative effect of these exfoliants can be devastating to the skin’s protective barrier. This is perhaps the most significant modern risk of simplistic face mapping: treating zones as separate countries without considering their shared ecosystem.
Over-exfoliation strips the skin of its essential lipids, leading to a compromised barrier. The tell-tale signs are not necessarily more acne, but rather a new set of problems: patchy redness on the high points of the face, increased sensitivity to products that were once fine, and a strange, waxy-looking shine without any actual oiliness. As dermatologists cited in a review of common acne map pitfalls report, patients often arrive with this condition, confused because they were diligently treating each « problem zone » as instructed by online guides.
Repairing this damage requires a complete paradigm shift from « attacking » problems to « nurturing » the skin back to health. The first and most critical step is to stop all active ingredients—acids, retinoids, and physical scrubs—for a minimum of two weeks. This « exfoliation holiday » gives the skin time to begin its natural repair process. The focus should then shift to a barrier repair protocol, mapping products based on healing properties:
- For red, inflamed areas: Apply products with Cica (Centella Asiatica) or Madecassoside to calm inflammation.
- For tight, flaky zones: Use moisturizers rich in Ceramides, Cholesterol, and Fatty Acids to replenish the skin’s lipid matrix.
- For overall support: A Niacinamide serum can be layered over the entire face to help restore barrier function and reduce redness.
Only after the barrier is fully repaired—when the skin feels calm, hydrated, and comfortable—should actives be slowly and methodically reintroduced, one at a time, with several rest days in between.
When to Switch Your Routine Based on Weather Changes?
A truly diagnostic approach to face mapping recognizes that your skin is not a static entity. It is a dynamic organ that responds to its environment, and one of the biggest environmental shifts is the change of seasons. The lightweight gel moisturizer that felt perfect in the humid summer months may leave your skin feeling tight and parched in the dry winter air. Adjusting your routine based on weather is an advanced form of face mapping that ensures your skin gets what it needs, when it needs it.
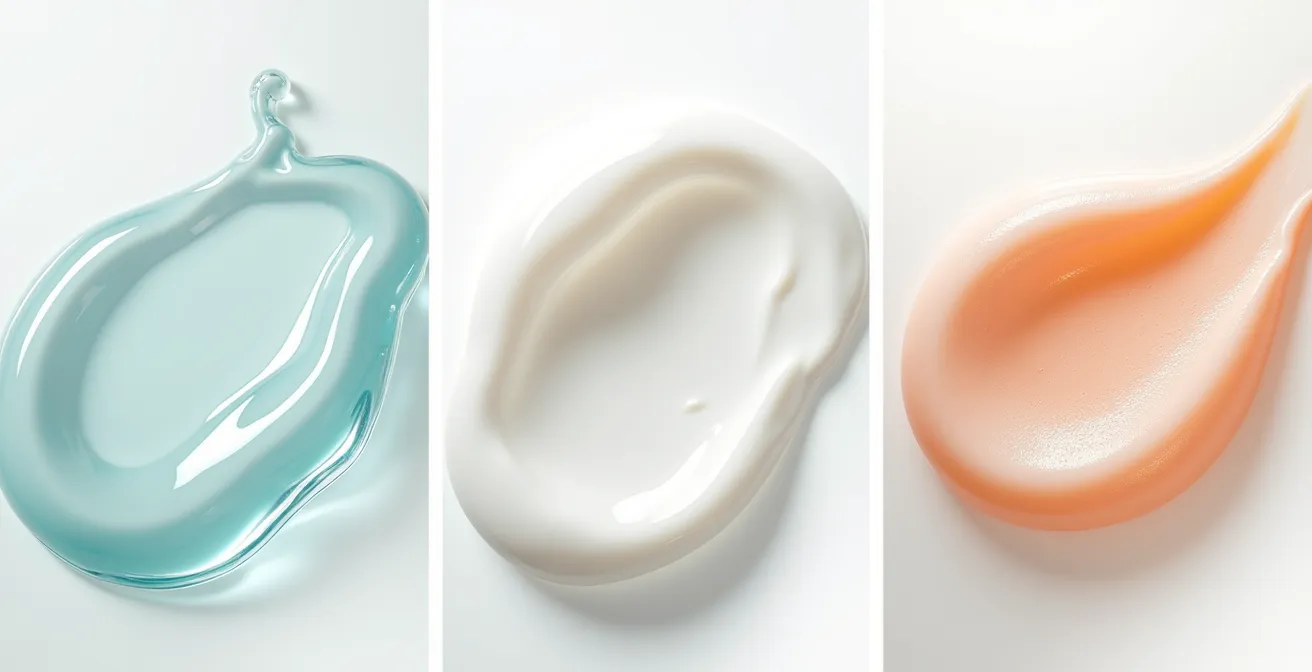
The core principle is to map product textures to seasonal needs. In summer, when heat and humidity increase sebum production, the focus should be on lightweight hydration and oil control. This means switching to gel-based cleansers, water-light serums (like those with hyaluronic acid), and oil-free moisturizers, especially in the T-zone. In winter, cold air and indoor heating strip moisture from the skin, compromising the lipid barrier. The routine should shift to support and protect this barrier, using creamier cleansers, richer serums, and more occlusive moisturizers or balms containing ceramides and oils.
This textural transition is the key to seasonal skin mapping. The goal is to provide adequate moisture without causing congestion in the summer, and to provide adequate protection without feeling heavy or greasy in the winter.
The transition shouldn’t happen overnight. A gradual, one-week protocol is ideal to prevent shocking your skin. Start by introducing one new seasonal product every other day. Then, you might use your new, lighter summer products in the morning and finish your richer winter products at night. By the end of the week, you can fully transition while monitoring each facial zone for its response. This methodical approach, as recommended by some dermatology partners, ensures your skin’s ecosystem remains balanced throughout the year.
Skin Scanners vs Dermatologist Eye: Which Is More Accurate?
As we move deeper into a diagnostic approach, it’s important to understand the tools available and their respective strengths and limitations. In the world of professional skin analysis, two primary methods dominate: advanced skin scanners and the trained dermatologist’s eye. Neither is universally « better »; they are complementary tools that, when used together, provide the most comprehensive face map possible. A common misconception is that technology is always more accurate, but it lacks the critical context that a human expert provides.
Skin scanners offer objective, quantifiable data. They can use UV light and advanced imaging to measure things the naked eye cannot see, such as subsurface sun damage, the exact size of pores, and the distribution of bacteria. This is incredibly valuable for tracking measurable changes over time. For example, a scanner can objectively show if a new skincare routine is successfully reducing inflammation or if sun damage is worsening.
However, a scanner cannot assess skin texture through touch, understand the nuances of a patient’s lifestyle, or interpret the data within a broader medical context. This is where the dermatologist’s eye and experience are irreplaceable. As Dr. Amy Kassouf notes in a Cleveland Clinic interview, « Most dermatologists don’t physically ‘map’ people, but we do recognize various zones of the face to help us figure out what’s going to work best for our patients. » A dermatologist performs a holistic diagnosis, evaluating skin elasticity, integrating the patient’s history, and identifying potential root causes that a machine would miss.
The following table breaks down the strengths and weaknesses of each approach, illustrating why a combined method offers the gold standard in comprehensive face mapping.
| Analysis Method | Strengths | Limitations | Best For |
|---|---|---|---|
| Skin Scanner | Quantifies subsurface damage, measures pore size to nanometer, maps bacteria levels objectively | Cannot assess texture through touch, misses patient history, lacks contextual interpretation | Tracking measurable changes over time |
| Dermatologist Eye | Evaluates skin elasticity and texture, integrates patient history, identifies root causes | Subjective assessment varies, cannot see subsurface damage, less precise measurements | Holistic diagnosis and treatment planning |
| Combined Approach | Scanner provides quantitative data, dermatologist adds qualitative interpretation | Higher cost, requires both technologies | Comprehensive 3D face mapping |
Key Takeaways
- Face mapping is a diagnostic process, not a fixed chart. It requires observing lesion type, skin condition, and texture zone by zone.
- You must differentiate between skin type (genetic, e.g., dry) and skin condition (temporary, e.g., dehydrated) for effective treatment.
- Cumulative damage from over-exfoliating different zones is a major risk; a « less is more » approach and barrier support are crucial.
How to Become a Licensed Esthetician: The Reality of the Training?
Understanding the basics of diagnostic face mapping is empowering, but it’s equally important to recognize the depth of knowledge that separates a skilled amateur from a licensed professional. The training to become a licensed esthetician goes far beyond the online charts and basic tests we’ve discussed. It involves hundreds of hours of scientific education and hands-on practice, transforming face mapping from a simple guide into a sophisticated clinical assessment.
Professional training equips estheticians with advanced diagnostic tools and techniques. As expert esthetician Graceanne Svendsen points out, this includes using a Wood’s Lamp to analyze invisible skin damage and map bacteria distribution, or reading « lesion morphology » to understand acne at a cellular level. This is a world away from simply guessing based on location. Furthermore, a core part of the training is learning the « Scope of Practice Map. » This is the critical skill of differentiating between a cosmetic issue an esthetician can treat (like standard acne or dehydration) and a medical condition (like rosacea, cystic acne, or perioral dermatitis) that must be referred to a dermatologist. This ethical and diagnostic boundary is a cornerstone of professional practice.
Esthetician training teaches sophisticated mapping processes beyond online face maps, including Wood’s Lamp analysis for invisible damage and bacteria mapping, plus lesion morphology reading to understand acne causes at a cellular level.
– Graceanne Svendsen, LE, CME, Shafer Clinic Fifth Avenue NYC
Perhaps the most significant skill taught is « Verbal Face Mapping. » As outlined in professional training curricula, this is the art of the consultation. An esthetician asks strategic questions about diet, stress, medications, and lifestyle to build a comprehensive history that contextualizes what they see on the skin. A breakout on the chin might be hormonal, but verbal mapping could reveal it’s exacerbated by a new medication or high-stress period. This holistic approach, combining visual, tactile, and historical data, is the true essence of professional face mapping.
Mastering self-assessment is the first step. The ultimate step is knowing when to entrust your skin to someone with the training to read its deepest signals. A professional can create a truly personalized protocol that addresses the root cause, not just the symptom.
Now that you are equipped with a diagnostic mindset, the next logical step is to apply this knowledge consistently. Begin by performing the Wash Test to establish your baseline and start building your own personalized skin map, and do not hesitate to consult a licensed professional for a comprehensive diagnosis that goes beyond what the eye can see.