The frustrating truth is that finding the perfect foundation has less to do with the vein test and more to do with mastering your unique skin chemistry.
- Foundation changing color (oxidation) is a chemical reaction between pigments and your skin’s natural oils and pH level, not just a poor undertone match.
- Color theory is non-negotiable. Understanding how to neutralize redness or dark circles with correctors *before* foundation is the first step to a flawless canvas.
Recommendation: Stop blaming the undertone. Start by diagnosing your true skin type with the ‘Wash Test’ and selecting products whose chemistry is compatible with your skin’s biology for true color integrity.
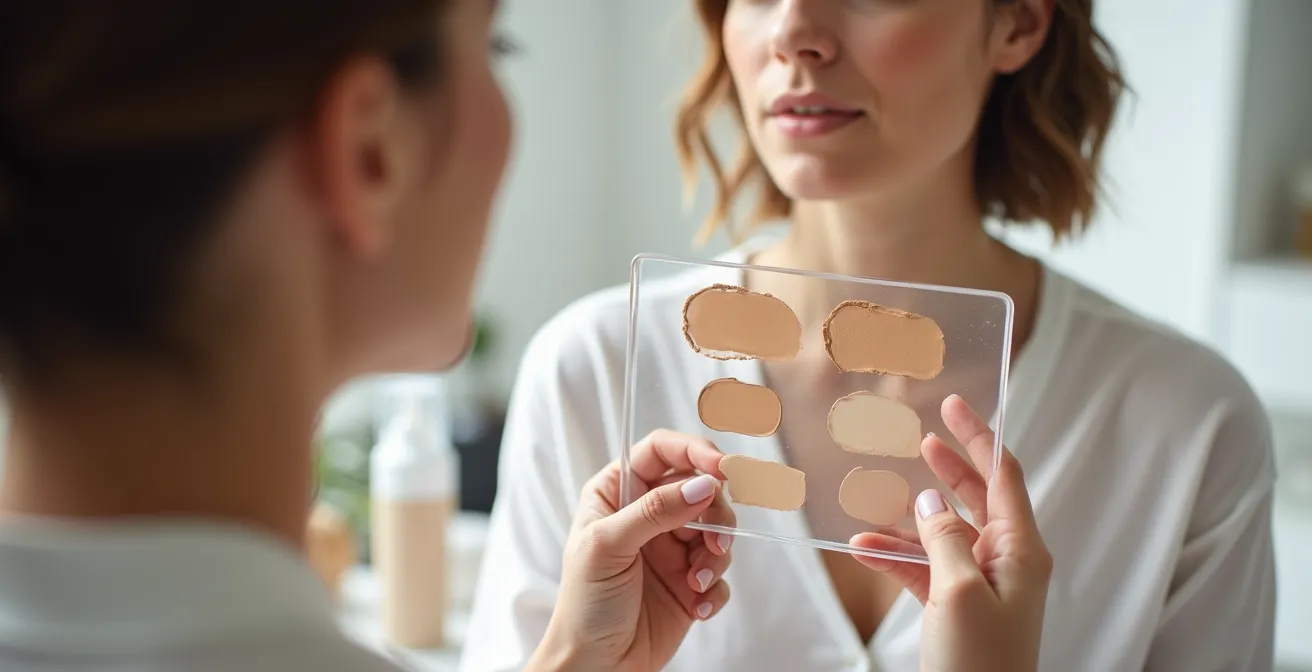
Every makeup user knows the unique frustration: spending time and money on a new foundation that looks perfect in the store, only to find it has turned orange or ashy by lunchtime. The common advice is to « find your undertone. » You’ve likely heard it all: check your veins, see how you tan, compare silver and gold jewelry. While these are starting points, they are a woefully incomplete picture. They treat your skin as a static, flat color swatch, which it is not. The real culprit behind a mismatched foundation is often a matter of chemistry, not just color.
Before we dive deeper, it’s crucial to distinguish between skin tone and undertone. Your skin tone is the surface color you see in the mirror (fair, light, medium, deep). It can change with sun exposure. Your undertone is the subtle, permanent shade beneath the surface, typically categorized as cool (pink, red, or blueish hints), warm (yellow, peachy, or golden hints), or neutral (a mix of both). The secret to a truly perfect match, however, lies in a third, often-ignored dimension: the dynamic harmony between product formulations and your skin’s unique biological environment.
But what if the key wasn’t just diagnosing a static undertone, but understanding and managing the active reactions happening on your face throughout the day? This guide will move beyond the basics of color matching. We will explore the science of why makeup changes, shifts, and fades. We’ll decode the principles of color theory, master product layering for longevity, and establish hygiene protocols that directly impact your makeup’s performance and your skin’s health. It’s time to stop searching for a magic bottle and start understanding the science of a flawless application.
This article provides a complete protocol for achieving makeup that not only matches but also lasts. Follow this comprehensive guide to understand the intricate dance between product and skin, ensuring your look remains impeccable from morning to night.
Summary: A professional guide to a perfect makeup match
- Why Green Concealer Works on Redness but Not Dark Circles?
- Cream vs Powder Blush: Which Lasts Longer on Oily Skin?
- The Oxidation Risk: Why Your Foundation Changes Color by Noon?
- How to Make Lipstick Last Through a Dinner Date?
- When to Throw Away Your Beauty Blender to Avoid Breakouts?
- How to Perform the « Wash Test » to Find Your True Skin Type?
- When to Reapply Sunscreen Over Makeup Without Ruining Your Look?
- Why Double Cleansing Is Non-Negotiable If You Wear SPF?
Why Green Concealer Works on Redness but Not Dark Circles?
The answer lies in the foundational principles of color theory, a non-negotiable skill for any serious makeup user. The color wheel teaches us that opposite colors neutralize each other. Green sits directly opposite red, which is why a thin layer of green corrector chemically cancels out the visual signal of redness from acne, rosacea, or irritation. Applying it to blue or purple under-eye circles, however, will only result in a muddy, grayish cast because green and blue are neighbors on the color wheel, not opposites.
To neutralize the blue and purple tones common in dark circles on fair to light skin, you need a peach or light orange corrector. For deeper skin tones, where discoloration can appear more brown or purple, a more intense orange or even a reddish corrector is required to achieve true cancellation. This is not about masking the color with a thick layer of product; it is a precise chemical illusion. The goal is to create a neutral base so that your skin-toned concealer and foundation have to do less work, resulting in a more natural, less cakey finish.
Mastering this technique elevates your application from simple coverage to true artistry. The correct corrector shade makes your complexion products work more efficiently, allowing you to use less and achieve a more believable result. It is the first and most critical step in achieving color integrity.
This comparative guide illustrates the specific corrector to use for each common skin concern.
| Skin Concern | Color to Neutralize | Corrector Shade | Best for Skin Tone |
|---|---|---|---|
| Redness (Rosacea/Acne) | Red | Green | All skin tones |
| Dark Circles (Blue) | Blue/Purple | Peach/Light Orange | Fair to Light |
| Dark Circles (Brown) | Brown/Purple | Orange/Red | Medium to Deep |
| Dark Spots | Brown | Yellow/Gold | All skin tones |
| Dullness | Gray/Ashy | Pink/Lavender | Fair to Medium |
Ultimately, choosing the right corrector is the foundational step before foundation itself. It ensures the final canvas is perfectly even-toned, allowing your actual skin-matched products to shine.
Cream vs Powder Blush: Which Lasts Longer on Oily Skin?
For those with oily skin, the battle for makeup longevity is constant. When it comes to blush, the choice between cream and powder is a critical one. Intuitively, one might assume powder is superior, as it helps absorb oil. However, the reality is more nuanced. A powder blush applied directly to oily skin can quickly grab onto excess sebum, becoming patchy and faded within hours. A cream blush can provide a beautiful dewy finish, but its emollient base can mix with natural oils and slide off the face just as fast.
The secret to extended wear on oily skin lies not in a single product, but in a strategic layering technique that leverages the strengths of both formulations. This method creates a multi-layered bond with the skin that is far more resistant to oil breakthrough. It’s about building structure and stability from the base up, ensuring the color has something to adhere to beyond a slick surface.
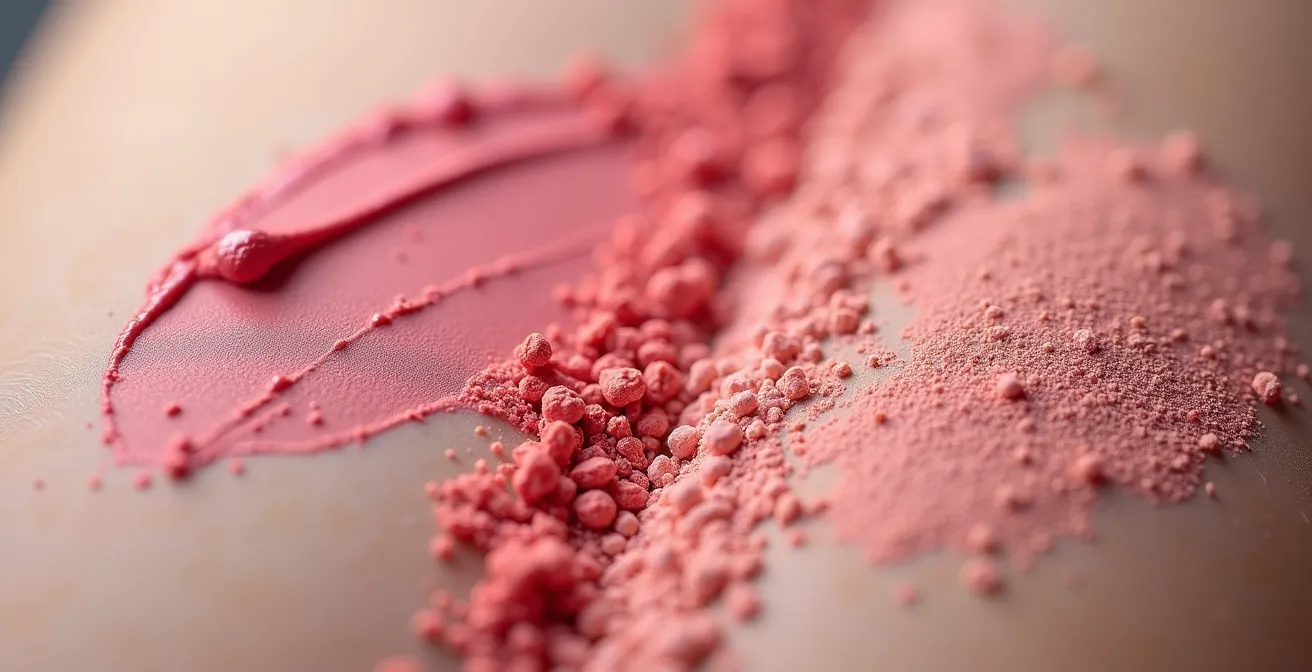
As the image above highlights, the textures are fundamentally different. Cream provides an adherent, pliable base, while powder creates a soft-focus, locked-in finish. By combining them, you achieve the best of both worlds: the « grip » of a cream and the setting power of a powder.
Case Study: The « Blush Sandwich » Technique for 12-Hour Wear
Developed by professional makeup artist Neil Scibelli for performers with oily skin, this technique is a game-changer. It involves three steps: first, apply a layer of cream blush and blend. Second, lightly set the area with a translucent setting powder. Third, apply a coordinating powder blush on top. In tests conducted on stage performers, this « sandwich » method maintained visible color for an average of 10-12 hours, a dramatic improvement over the 3-4 hours from cream alone or 6-7 hours from powder alone. The key is creating thin, bonded layers that resist both oil and friction.
This layering protocol proves that for oily skin, the answer isn’t cream *or* powder, but cream *and* powder. It’s a perfect example of how application science can overcome the challenges of skin biology.
The Oxidation Risk: Why Your Foundation Changes Color by Noon?
This is the most common and misunderstood problem in makeup. Oxidation is a chemical reaction. It occurs when pigments and oils in your foundation are exposed to air and, more importantly, the specific pH level and oils on your skin. When a foundation « oxidizes, » it typically darkens and shifts to a more orange or grayish tone. This is not the foundation « settling in »; it is its chemical structure being altered by your unique skin biology.
Several factors in a foundation’s formulation can contribute to oxidation, including certain oils, SPF ingredients, and pigments like iron oxide. However, the primary catalyst is often your own skin. If your skin is oily or has a more acidic pH (a lower number on the scale), it will accelerate this reaction. In fact, research confirms that the effect is significant; according to cosmetic chemistry studies, 67% of foundations oxidize more noticeably on skin with a pH below 5.0. This is why a foundation can look perfect on one person and turn orange on another within an hour.
To combat this, you must control the variables. First, use a primer. A good silicone-based primer creates a barrier between your skin’s oils/pH and the foundation, slowing down the chemical reaction. Second, always test a foundation not on your hand, but on your jawline, and wait. The « Oxidation Test Protocol » is simple: apply a swatch and check it after 30 and 60 minutes in natural light. If the color remains true, its chemistry is compatible with yours. This single step can save you from countless purchasing mistakes and ensure true color integrity all day.
Therefore, solving the oxidation issue is less about finding a « non-oxidizing » formula and more about creating a stable environment on your skin where the foundation’s chemistry can remain intact.
How to Make Lipstick Last Through a Dinner Date?
A dinner date presents the ultimate test for lipstick longevity, combining moisture, oils, and friction. The key to ensuring your lip color survives is not just about the product you choose but, crucially, the application protocol. A single swipe of lipstick, no matter how « long-wearing » it claims to be, lacks the structural integrity to withstand a meal. True staying power comes from building thin, set layers.
The classic professional method involves blotting and powdering. After applying your first coat of lipstick, separate a 2-ply tissue into a single layer. Press this thin tissue against your lips and, using a fluffy brush, dust a small amount of translucent setting powder *through* the tissue. The tissue acts as a sieve, allowing only the finest particles of powder to reach the lipstick, setting the oils and waxes without creating a cakey texture. Remove the tissue and apply a second coat of lipstick for color intensity. This creates a flexible, durable film that is far more resilient than a single, thick layer.
Study: Liquid Lipstick vs. Traditional Formula Durability
While layering helps traditional lipstick, what about modern liquid formulas? A 2024 comparison test revealed that the choice depends on the meal. During the consumption of oily foods, traditional wax-based lipsticks showed an 85% color loss. Modern liquid lipsticks, which form a polymer film, retained 60% of their color but were prone to cracking at the lip lines. For water-based beverages, traditional formulas were minimally affected, while liquid lipsticks showed no change. The conclusion is that neither is universally superior; a liquid lipstick is better for an oily meal if you can tolerate potential flaking, while a well-set traditional lipstick is more comfortable and reliable for less challenging situations.
Ultimately, a combination of the right product for the occasion and a meticulous application technique is what guarantees your lipstick will see you through dessert and beyond.
When to Throw Away Your Beauty Blender to Avoid Breakouts?
The beloved makeup sponge is a revolutionary tool for achieving a seamless, airbrushed finish. However, its porous, damp nature also makes it a perfect breeding ground for bacteria, mold, and biofilm. Using a dirty sponge not only results in a muddy, streaky application but can also be the direct cause of stubborn breakouts, skin irritation, and infections. Knowing when to replace it is a non-negotiable aspect of skin health and makeup hygiene.
A common rule of thumb is to replace your sponge every three months, but this is a guideline, not a strict rule. The actual lifespan depends heavily on how often you use it and, more importantly, how diligently you clean it. A sponge should be washed after every single use with a dedicated cleanser to remove product, oil, and dead skin cells. However, even with perfect cleaning, the material itself degrades over time. The cell structure breaks down, making it less effective at blending and harder to clean thoroughly.
You must become an expert at spotting the signs of a compromised sponge. Relying on a calendar is not enough; a visual and textural audit is far more accurate. A sponge that is past its prime will actively work against you, absorbing more product than it deposits and reintroducing bacteria onto your clean skin, sabotaging both your complexion and your makeup application.
Your Essential Sponge Replacement Audit
- Permanent Stains: Check for discoloration that won’t wash out. This indicates deep product embedding where bacteria can thrive.
- Physical Damage: Look for any nicks, tears, or holes. These create pockets that are impossible to sanitize completely.
- Loss of ‘Bounce’: Wet the sponge and squeeze. If it doesn’t expand to its full size or feels dense and heavy, its internal structure has broken down.
- Lingering Odor: After washing and drying, perform a smell test. Any musty or sour odor is a definitive sign of bacterial or mold growth.
- Slimy Texture: Feel for any persistent sliminess even after a thorough cleaning. This can indicate the formation of a bacterial biofilm that harbors germs. If your sponge fails any of these checks, it’s time to replace it immediately. You can source more details about the risks from a study on bacteria in makeup bags.
Treating your makeup sponge as a disposable tool with a firm expiration date is a crucial investment in the clarity of your skin and the quality of your makeup finish.
How to Perform the « Wash Test » to Find Your True Skin Type?
Before you can address oxidation or choose the right blush formula, you must have an accurate diagnosis of your skin type. Many people misdiagnose their skin, often confusing dehydration (a temporary condition) with true dryness (a skin type). The most reliable, low-tech method for determining your baseline is the « Wash Test. » It requires no special equipment, only careful observation.
The protocol is simple: cleanse your face with a gentle, pH-balanced, fragrance-free cleanser. Pat your skin dry—do not rub—and then wait. Do not apply any serums, moisturizers, or other products. Over the next 90 minutes, your skin’s natural tendencies will reveal themselves. At 30 minutes, note the initial feeling. Is it tight and pulling (dry) or comfortable (normal/oily)? At 60 minutes, check your T-zone for shine. By 90 minutes, the final verdict should be clear: shine all over indicates oily skin; shine only in the T-zone is combination skin; tightness and potential flaking with no oil is dry skin; and feeling comfortable throughout points to normal skin.
Case Study: The Impact of Environment on Skin Type
A 2024 dermatological study highlighted that your environment plays a significant role. The study found that 43% of participants registered as a different skin type when tested in a humid, outdoor environment versus a climate-controlled indoor one. High humidity can make normal skin seem oily, while low-humidity air conditioning can make normal skin feel dry. For the most accurate product selection, the study recommends performing the wash test twice: once in a controlled indoor setting to find your true, baseline skin type, and once in your typical daily environment (e.g., your office) to understand your « conditional skin state. »
Knowing your true skin type is the foundation upon which all other product choices—from skincare to foundation—should be built. It is the starting point for achieving dynamic harmony.
When to Reapply Sunscreen Over Makeup Without Ruining Your Look?
Sunscreen’s efficacy degrades over time with sun exposure, meaning reapplication every two hours is non-negotiable for proper protection. For makeup wearers, this presents a significant challenge: how to reapply SPF without destroying a perfectly crafted look. The answer is not to slather cream over your foundation, but to choose a reapplication method specifically designed for this purpose, tailored to your makeup’s finish.
The product type and application technique are entirely dependent on the finish of your base makeup. A matte, powdered look cannot tolerate a spray, which can cause pilling and blotchiness. Conversely, a powder SPF will look dusty and dry over a dewy, cream-based look. The key is to match the reapplication product’s texture to your existing makeup’s texture to ensure a seamless blend.
For a quick and effective method with an SPF spray, try the « Sponge Press Technique. » Instead of spraying directly onto your face, which can result in an uneven application and disturb makeup, spray 2-3 pumps of a fine mist SPF onto a clean, slightly damp makeup sponge. Then, gently press and roll the sponge over your face, focusing on the high points like the forehead, nose, and cheekbones. This deposits a fresh layer of sunscreen evenly without any rubbing or dragging, preserving your makeup’s integrity.
For a detailed breakdown, the following table matches the best reapplication method to your specific makeup finish.
| Makeup Finish | Best Reapplication Method | Product Type | Application Technique |
|---|---|---|---|
| Matte/Powder | SPF Powder | Mineral brush-on SPF | Swirl and tap off excess, apply in pressing motions |
| Dewy/Natural | SPF Setting Spray | Fine mist SPF 30+ | Hold 8 inches away, spray in X and T formation |
| Full Coverage | Cushion Compact | High-SPF foundation compact | Gentle patting motions, don’t rub |
| Minimal/No-Makeup | Clear SPF Stick | Transparent sun stick | Glide over skin, pat to blend edges |
With the right product and technique, as detailed in guides from sources like specialized cosmetic brands, reapplying sunscreen is no longer a destructive process but a simple step to maintain both protection and perfection.
Key Takeaways
- Your perfect foundation match depends on the chemical reaction between product and your skin’s pH, not just a static undertone test.
- Longevity is built in layers. Techniques like the « Blush Sandwich » or powder-setting lipstick dramatically outperform single-product applications.
- Hygiene is paramount. A clean sponge and proper end-of-day cleansing are as crucial to your makeup’s performance as the products themselves.
Why Double Cleansing Is Non-Negotiable If You Wear SPF?
At the end of the day, the most critical step in maintaining skin health and preparing it for the next day is the complete removal of all products, especially sunscreen. Many believe a single face wash is sufficient, but this is a critical misunderstanding of modern product chemistry. Today’s sunscreens, particularly water-resistant formulas, are engineered for tenacity. They contain advanced polymers that form a film over the skin, designed to repel water and sweat. This is excellent for protection but makes them incredibly difficult to remove with a water-based cleanser alone.
In fact, these formulations are incredibly robust. To earn a « water-resistant » label, products must prove they can maintain their SPF value after extensive water exposure, with some designed to withstand 80 minutes of water immersion. A standard foaming or gel cleanser, which is primarily water-based, simply cannot dissolve this resilient, oil-soluble film. Attempting to do so often requires harsh rubbing, which strips the skin’s protective barrier and still leaves behind a residue of SPF, makeup, and pollutants that can lead to clogged pores and breakouts.
This is where the double cleansing protocol becomes essential. It is a two-step process based on the chemical principle that « like dissolves like. »
Step 1: The Oil Cleanse. An oil-based cleanser (in liquid, balm, or cream form) is applied to dry skin. It latches onto and dissolves oil-soluble impurities: sunscreen, sebum, and long-wear makeup. Cosmetic chemists often use the « greasy pan » analogy: you can’t clean an oily pan with water alone. The oil cleanser acts like dish soap, breaking down the grease.
Step 2: The Water Cleanse. After emulsifying the oil cleanser with a little water and rinsing, you follow up with your gentle, water-based cleanser. This second step removes any remaining oil residue and cleanses water-soluble impurities like sweat and dirt, leaving the skin truly clean without being stripped.
Embracing the double cleanse isn’t a luxury; it is a fundamental requirement for anyone who wears sunscreen or makeup, ensuring your skin is a clean canvas, ready to repair itself overnight and perform at its best the next day.