The key to mastering balayage isn’t just choosing between foil and clay; it’s understanding *why* you’re choosing your artistic medium for the specific hair canvas in front of you.
- Foils (« Markers ») provide maximum lift and controlled contrast, essential for breaking through dark hair or creating high-impact, defined looks.
- Clay (« Watercolors ») creates soft, diffused, open-air blends for truly natural, sun-kissed effects with the gentlest grow-out.
Recommendation: Stop thinking in terms of ‘better’ or ‘worse’. Start analyzing the client’s hair as a canvas to select the right tool that matches your artistic intent.
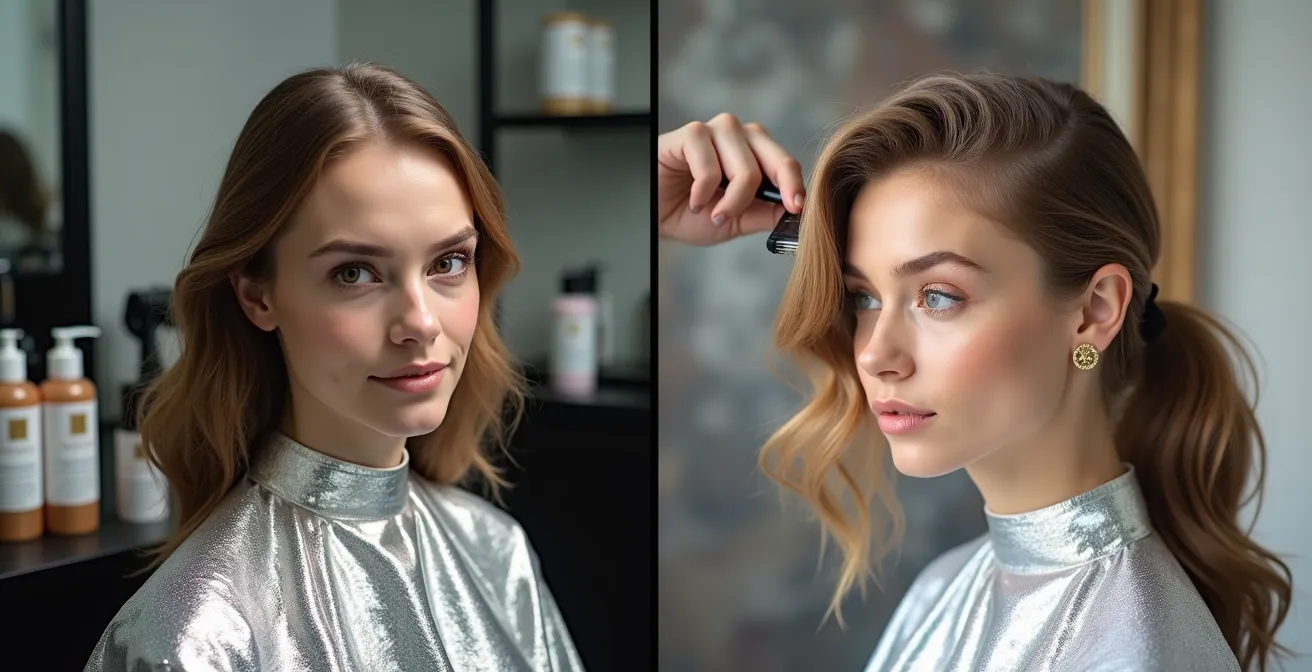
A client walks in, phone in hand, showing a picture of a flawless, sun-drenched balayage. The color melts seamlessly from a natural root to bright, dimensional ends. For a hair student, this is both the goal and the puzzle. How was this created? Was it the freehand, painterly motion of clay lightener, or the controlled, incubating power of foils? The common wisdom says, « foils for lift, clay for a natural look, » but this oversimplification fails to capture the true artistry and technical decision-making involved.
True mastery of balayage lies beyond this basic dichotomy. It requires you to think like an artist choosing their medium. The client’s hair is your canvas—its history, texture, and starting level dictate what’s possible. The lightener, whether clay-based or a traditional powder in foil, is your paint. The real question isn’t which is « better, » but which medium will best execute your artistic intent on this specific canvas. One offers the sharp, graphic definition of a marker, while the other provides the soft, blendable wash of a watercolor.
This guide moves past the platitudes to provide a technical and artistic framework. We will explore the nuances of each method, from the science of lift and the risk of brassiness to the formulation of a perfect root shadow. By understanding when to be a graphic illustrator and when to be a watercolor painter, you will gain the confidence to create predictable, beautiful, and bespoke balayage results every single time.
To navigate this complex choice, this article breaks down the essential factors every budding balayage artist must consider. The following sections will guide you through the technical differences, artistic applications, and client management strategies for both foil and clay techniques.
Summary: A Deep Dive into Balayage Techniques
- Why Balayage Requires Less Maintenance Than Traditional Highlights?
- The Risk of Orange Tones in Brown Balayage
- How to Formulate a Root Shadow for a Seamless Grow-Out?
- When to Refresh Balayage vs Just Getting a Gloss?
- Open Air vs Foilyage: Which Lifts Dark Hair Higher?
- Ashy or Golden: Which Blonde Suits Pale Skin?
- Markers vs Watercolors: Which Medium Suits Runway Sketching Best?
- Box Dye vs Salon Color: Why Correction Costs $300 More?
Why Balayage Requires Less Maintenance Than Traditional Highlights?
The primary reason balayage offers a gentler maintenance schedule lies in its application. Unlike traditional highlights, which are placed methodically up to the scalp and create a clear line of demarcation as the hair grows, balayage is hand-painted. This painterly approach focuses on creating a gradual, diffused transition from the natural root. There are no harsh lines to grow out, meaning the client avoids the tell-tale « roots » that demand frequent touch-ups. This technique essentially builds the grow-out period directly into the initial design, making it the ultimate low-maintenance color.
The choice of medium—clay or foil—further defines this maintenance schedule. A soft, open-air clay balayage provides the most graceful grow-out, as it offers the lowest contrast and most diffused application. In contrast, foilyage creates brighter, higher-contrast results that, while still blended, may show the grow-out more distinctly over time. Data confirms this significant difference in upkeep; while traditional highlights require attention every 6-8 weeks, balayage requires touch-ups every 10-14 weeks on average. This extended time between appointments is a major selling point for clients and a testament to the technique’s sophisticated design.
The table below clearly illustrates how the specific technique directly impacts the client’s commitment, a crucial part of the initial consultation.
| Technique | Touch-up Frequency | Annual Salon Visits | Key Benefit |
|---|---|---|---|
| Traditional Highlights | 6-8 weeks | 6-8 visits | Uniform color |
| Foilyage | 4-5 months | 3-4 visits | Higher contrast blend |
| Clay Balayage | 6-12 months | 1-2 visits | Softest grow-out |
Ultimately, the reduced maintenance is not an accident; it’s a direct result of intentional placement and the artistic blending at the root. You are not just applying color; you are designing a look that evolves beautifully with the client’s natural hair growth, freeing them from the constant cycle of root retouches.
This long-term approach completely changes the client’s relationship with their hair color, turning it from a chore into a long-lasting enhancement of their natural beauty.
The Risk of Orange Tones in Brown Balayage
Every colorist’s nightmare and a common fear for brunette clients is the dreaded « brassy » or orange result. This unwanted warmth is not a mistake in toner choice; it’s a fundamental misunderstanding of the hair’s underlying pigment and the lightener’s lifting capability. When you lift dark hair, you expose its natural undertones in a predictable sequence: from red to red-orange, to orange, to gold, and finally to pale yellow. The key to avoiding brassiness is to ensure your chosen lightener has enough power to lift the hair *past* the unwanted orange stage to a level where a toner can effectively neutralize the remaining warmth.
This is where the choice between clay and foil becomes critical, especially on a dark hair « canvas. » Open-air clay lighteners are designed for a gentler, more superficial lift. As documented by professional colorists, a typical clay lightener often achieves only 3-4 levels of lift. For a client starting at a level 1-5, this is simply not enough power to bypass the vibrant orange phase. For these clients, using an open-air technique is practically a guarantee for unwanted warmth. Foilyage is therefore recommended for hair levels 1-6 to achieve the necessary lift, while traditional open-air balayage is best reserved for levels 7 and above where the underlying pigment is already in the golden-yellow family.
Before ever mixing your lightener, a thorough diagnosis of the hair’s natural undertones is non-negotiable. This pre-emptive step allows you to anticipate the warmth you’ll encounter and choose your technique and formulation accordingly. It’s the first step in a professional process that prevents problems before they start.
Your 5-Point Checklist: Identifying Hair Undertones
- Examine your client’s natural hair in natural daylight; indoor lighting can distort and hide crucial undertones.
- Look closely at the hair around the temples and nape, as these areas often reveal the truest underlying pigments.
- Identify if the hair naturally pulls red (warm), orange (neutral-warm), or gold (cool-warm) when exposed to the sun over time.
- If in doubt, perform a strand test with a 20-volume developer for 30 minutes to reveal the actual lifting undertone you will be working against.
- Clearly communicate your undertone findings to your client and explain how this informs your choice of technique for targeted toner selection.
By respecting the laws of hair color and the limitations of your tools, you transform the risk of orange tones from a likely disaster into a predictable and easily managed variable. It is a mark of technical expertise.
This diagnostic approach is what separates an amateur from a true color specialist—the ability to work with the hair’s nature, not against it.
How to Formulate a Root Shadow for a Seamless Grow-Out?
A root shadow, also known as a root smudge or color melt, is the secret weapon for creating that enviably seamless balayage blend. Its purpose is to bridge the gap between the client’s natural root color and the freshly lightened hair, effectively blurring any lines and ensuring the grow-out is as soft as possible. The formulation is not a one-size-fits-all solution; it must be tailored to the client’s natural hair level, the percentage of gray, and the desired level of contrast from the balayage itself. A successful root shadow looks like an intentional, diffused shadow, not a band of artificial color.
The choice between a demi-permanent and permanent color for your root shadow is the first critical decision. For most balayage blending, a demi-permanent formula is the superior choice. It provides a translucent, watercolor-like wash of color that can deepen the root and tone the hair without creating a solid, opaque line. This is ideal for a natural blend. According to professional colorists, a demi-permanent color is perfect unless you need to cover more than 50% gray hair, in which case a permanent color might be necessary for adequate coverage. The developer volume is also key; a low volume like 9-volume is typically used with demi-permanent color to deposit tone without any additional lift, preserving the integrity of the blend.
The visual difference between various root shading techniques is subtle but significant. Understanding whether to apply a deeper ‘drop root’ or a softer ‘root smudge’ is a crucial artistic decision, as shown in the image below, which compares these two key approaches on a finished blonde balayage.
As you can see, the technique dramatically alters the final effect at the root area. A well-formulated root shadow using a translucent demi-permanent color is what creates the signature « lived-in » look that balayage is famous for. It’s the final touch that elevates a good application to a great one, ensuring client satisfaction long after they leave the salon chair.
Mastering this step is not just about technique; it’s about providing a long-lasting, beautiful result that looks just as good weeks later as it did on day one.
When to Refresh Balayage vs Just Getting a Gloss?
A common point of confusion for both students and clients is understanding the difference between a full balayage refresh and a simple glossing service. This distinction is crucial for managing client expectations and maintaining the health of the hair. A gloss (or toner) is a maintenance service; its job is to refresh the tone of the *existing* lightened pieces, correcting any brassiness that has emerged and adding shine. A full balayage refresh, however, involves re-applying lightener to bring the brightness back up towards the root and add new dimension. Knowing which service is appropriate comes down to diagnosing the « why » behind the client’s dissatisfaction.
The decision hinges on two factors: tone and placement. If the client loves the placement of their highlights but feels the color has become dull or brassy, a gloss is the perfect solution. It’s a quick, affordable service that revives the color without further chemical processing. However, if the client feels their hair has grown out too much and the brightness is now too far from their roots, a gloss will not fix this. This is a placement issue, and only a partial or full balayage refresh, where new pieces are painted closer to the scalp, will solve the problem. The technique used in the initial service also plays a major role; a high-lift foilyage requires refresh appointments every 4-5 months, while clients with softer clay balayage can often go 6-12 months, needing only glosses in between.
For the client, the goal is simply to look good. For the stylist, the goal is to prescribe the correct service that achieves the aesthetic goal while preserving hair integrity. Re-lightening hair that only needs a tonal shift is a disservice that causes unnecessary damage. Conversely, trying to fix a grow-out issue with toner will only lead to a frustrated client. While the average salon client visits for services around 4.88 visits per year, a well-educated balayage client might only need 1-2 full refreshes, with 2-3 glossing appointments in between, maximizing the longevity of their color and their satisfaction.
Ultimately, prescribing the right service demonstrates your expertise and builds trust, ensuring the client returns for the right reasons, not out of frustration with their color.
Open Air vs Foilyage: Which Lifts Dark Hair Higher?
The answer to this question is unequivocally foilyage. The difference in lifting power between open-air processing with a clay lightener and incubating a powder lightener in foil is a matter of chemistry and physics. When a clay-based lightener is applied in open air, it begins to dry out. The outer shell hardens, which slows down the chemical process and effectively puts a cap on its lifting ability. This is by design, creating a soft, subtle lift. In contrast, when a powder lightener is sealed in a foil, it creates a closed environment. The foil traps heat from the scalp and moisture from the product, keeping the lightener active and accelerating the chemical reaction. This creates a powerful incubator that allows the lightener to work for a longer period and achieve a much higher level of lift.
The performance difference is significant and measurable. As the comparative data shows, the choice of technique directly dictates the maximum achievable lightness on the hair « canvas. »
| Technique | Maximum Lift Levels | Processing Time | Hair Integrity Impact |
|---|---|---|---|
| Foilyage with Foils | 7-9 levels | 30-45 minutes | Higher porosity increase |
| Clay Lightener Open Air | 3-4 levels (up to 7 with extended time) | 45-60 minutes | Minimal damage, moisture retention |
| Hybrid Interior/Exterior | Variable by section | 45 minutes average | Balanced approach |
However, the most sophisticated artists know it’s not always an « either/or » decision. A powerful strategy for dark-haired clients seeking maximum brightness with a natural-looking finish is the ‘Interior/Exterior’ hybrid approach. This involves using the power of foilyage on hidden interior sections of the hair to create bright, powerful pops of blonde. Then, for the top ‘veil’ sections that are most visible, a softer open-air clay lightener is used. This genius combination, highlighted in a strategy from a Fort Collins salon, delivers the best of both worlds: the dramatic lift needed for a true blonde result, combined with the soft, healthy, and seamlessly blended finish on the hair’s surface.
This hybrid method demonstrates a deep understanding of tools and artistic intent. It’s about using the ‘marker’ for bold impact where it’s needed and the ‘watercolor’ for softness where it’s seen.
This level of strategic thinking is what separates a good colorist from a true balayage master, allowing you to tackle even the most challenging dark hair transformations with confidence.
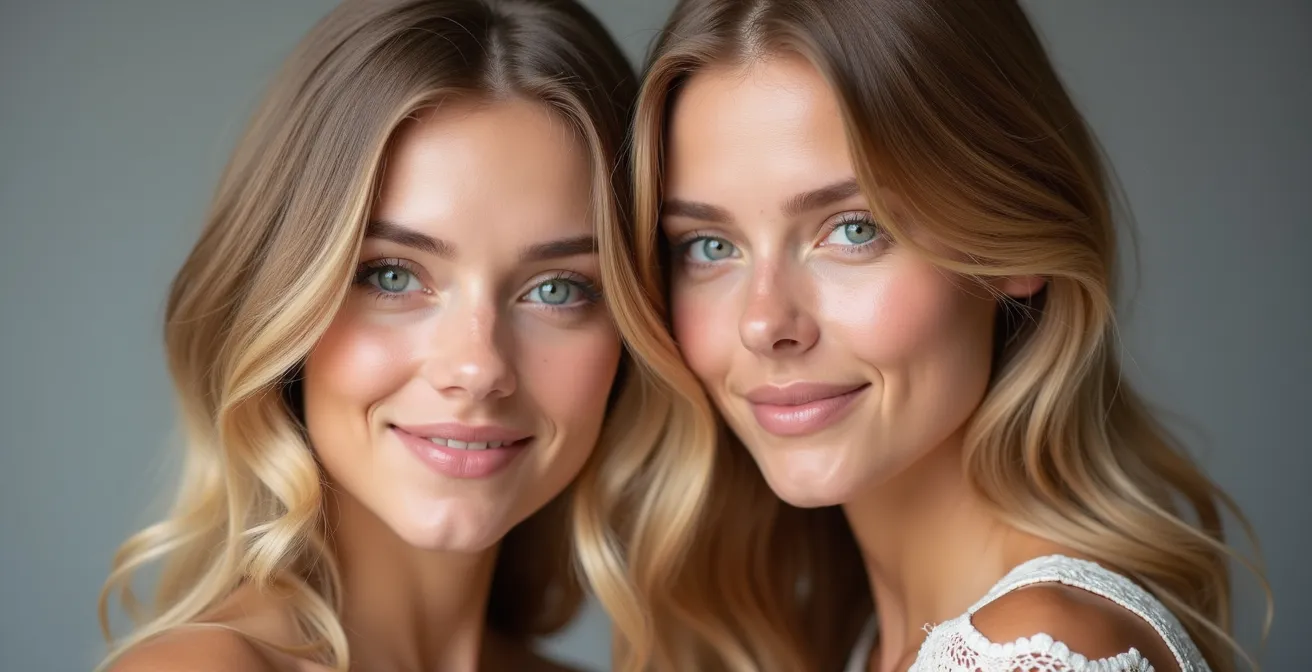
Ashy or Golden: Which Blonde Suits Pale Skin?
Choosing the right tone of blonde for a client with pale skin is a classic artistic challenge. The wrong choice can wash them out or create a jarring contrast, while the right one illuminates their complexion. The decision between an ashy or a golden blonde should be guided by one primary factor: the client’s skin undertone. Pale skin is not monolithic; it can have cool (pink, blue, red) undertones or warm (yellow, peach, golden) undertones. Matching the hair tone to the skin’s undertone creates harmony, while opposing them creates a deliberate, high-fashion contrast.
For a client with cool-toned pale skin (veins on the wrist appear blue, silver jewelry is most flattering), an ashy or platinum blonde is often the most harmonious choice. These cool-toned blondes complement the pink or blue hues in the skin. Conversely, for a client with warm-toned pale skin (veins appear greenish, gold jewelry shines brightest), a golden, honey, or buttery blonde will bring out the warmth in their complexion and create a healthy glow. The choice of balayage technique is directly influenced by this tonal goal. To achieve a true, cool ‘ashy’ blonde, you must lift the hair past the yellow stage, which often requires the powerful, controlled lift of foils. For a natural, dimensional ‘golden’ blonde, the softer, warmer lift provided by a clay lightener is often ideal.
This side-by-side comparison clearly shows how the right blonde tone—ashy for cool skin and golden for warm skin—can enhance and harmonize with a pale complexion, a critical element of a successful client consultation.
The consultation is where this discovery happens. You must become a detective, asking the right questions to identify the client’s undertone. Asking whether they gravitate towards silver or gold jewelry is a classic, effective trick. This allows you to guide them toward a result that will not just look good on the hair strand, but will make their entire face light up. This is the essence of bespoke hair color.
By mastering this part of the consultation, you move beyond simply applying color and begin designing looks that truly celebrate and enhance your client’s unique beauty.
Key Takeaways
- Lift vs. Blend: Foilyage maximizes lift (7-9 levels) for high contrast; open-air clay offers a softer lift (3-4 levels) for subtle, painterly blends.
- Maintenance is Intentional: The chosen technique directly dictates the client’s maintenance schedule; a soft clay application can last up to a year, while high-contrast foilyage needs a 4-5 month refresh.
- Formulation is Key: Never ignore the underlying pigment. A proper diagnosis of the hair’s ‘canvas’ and a targeted root shadow/gloss are non-negotiable for a seamless, brass-free result.
Markers vs Watercolors: Which Medium Suits Runway Sketching Best?
This question, seemingly from the world of fashion illustration, provides the single best metaphor for understanding the artistic difference between foilyage and clay balayage. In runway sketching, an artist chooses their medium based on the desired effect. Markers create bold, saturated, graphic lines with sharp edges and high impact. Watercolors create soft, diffused washes of color that flow and melt into one another, suggesting form rather than defining it. The choice depends entirely on the artist’s intent. Do they want to convey the sharp cut of a lapel or the fluid drape of silk?
This exact same choice faces the balayage artist. You are, in effect, sketching with light. As one hair education expert eloquently puts it, this analogy is a direct translation of our work.
Foils and foilyage are ‘Markers’—they create bold, defined, high-contrast lines with sharp impact. Clay lighteners are ‘Watercolors’—they create soft, diffused, blendable washes of color that melt into each other
– Hair Color Education Expert, Salt Society Education Blog
This « Markers vs. Watercolors » framework is a powerful consultation tool. When a client struggles to articulate their desired look, you can translate it into this artistic language. Do they want bold, « ribbony » highlights with clear definition? They are asking for markers (foilyage). Do they want a soft, subtle, « I just spent a month at the beach » glow? They are asking for watercolors (clay balayage). This shifts the conversation from technical jargon to a shared visual and artistic understanding.
Embracing this mindset means you stop seeing foils and clay as just tools for lift. They become your artistic mediums, chosen deliberately to execute a specific vision on the client’s canvas. It allows you to create truly bespoke color, sometimes even using both mediums on one head—’markers’ for impact underneath and ‘watercolors’ for a soft veil on top. This is the pinnacle of balayage artistry.
When you start thinking like a fashion illustrator choosing their medium, you unlock a new level of creativity and precision in your work.
Box Dye vs Salon Color: Why Correction Costs $300 More?
The significant price difference between a standard salon color and a box dye correction isn’t a penalty; it’s a direct reflection of the immense complexity, time, and product required to fix the chemical chaos box dye creates. A client who has used box dye doesn’t have a clean « canvas. » They have a canvas with unpredictable patches of different colors, varying porosity, and distinct bands of old, oxidized dye. Correcting this is not a straightforward application; it’s a forensic process that requires a master’s level of skill and a multi-faceted approach.
A professional colorist, like advanced specialist Ashlee Norman, details a process that is more like a strategic rescue mission than a simple color service. The correction involves using multiple bowls of different formulas, meticulously isolating sections, and often employing several techniques simultaneously. As her case study shows, a common approach is to use foils with an aggressive lightener to lift out stubborn box dye bands, while simultaneously painting a gentler clay lightener between the foils to blend the natural root. This requires an expert understanding of porosity, pH levels, and how different products will react on compromised hair. It is a high-stakes balancing act to lift the unwanted color without causing catastrophic damage.
The image below visualizes the challenge: the ‘before’ state of uneven banding and ‘hot spots’ from box dye requires a complex, multi-technique approach to achieve the clean, blended ‘after’ result, justifying the premium cost.
This is why specialty services like color corrections command premium prices. The stylist is not just applying a new color; they are undoing months or years of uneven chemical processing. The $300+ premium covers the extended appointment time (often 4-6 hours), the vast amount of product used (multiple lighteners, bond builders, toners), and most importantly, the years of education and experience required to navigate the project safely. It’s the price of expertise.
As a student, understanding the complexity of color correction is the ultimate motivation to master your craft from the beginning. By learning to analyze the canvas and choose the right medium—be it foil or clay—you become the artist who creates beauty, not the one who has to fix a mistake.