The illusion of saving money with box dye is shattered the moment you need a professional to fix it, revealing its true, exorbitant cost.
- Box dye creates a minefield of unpredictable chemical variables and damages hair structure, making corrections significantly longer, riskier, and more complex.
- Professional color is custom-formulated for your specific hair history, texture, and goals, preventing the most common—and expensive—disasters from the start.
Recommendation: Stop viewing salon color as a luxury and start seeing it as non-negotiable insurance for your hair’s integrity and your wallet.
You’re standing at the reception desk, staring at a number that feels like a typo. $300? $500? Maybe more. All to ‘fix’ a $15 box of color that looked so effortless on the packaging. The sticker shock is real, and it’s often followed by indignation. How can correcting a simple color job cost 20 times more than the original product? Your friends have probably warned you, and beauty blogs echo the sentiment that « box dye is damaging, » but these warnings rarely scratch the surface of the real issue.
Let’s be clear. The problem isn’t just that box dye is ‘bad.’ The problem is that it operates in a completely different chemical universe from professional color. Its one-size-fits-all formulation is a blunt instrument in a process that demands surgical precision. This article isn’t another vague warning; it’s a look under the hood with a master colorist. We’re going to dissect the chemistry, the math, and the forensic-level skill that separates a predictable, beautiful result from a high-stakes chemical gamble. You will no longer wonder *if* the cost is justified; you will understand precisely *why* every dollar is accounted for in time, product, and expertise.
This guide will walk you through the critical conversations about « Instagram hair, » the catastrophic risks of mixing chemicals, the science behind color stability, and the financial breakdown that proves professional service is an investment, not an expense. Welcome to the real world of hair color.
Summary: Box Dye vs Salon Color: The Real Breakdown
- How to Consult with a Client Who Wants « Instagram Hair » in One Session?
- The Risk of Bleaching Over Permed Hair: A Chemical Haircut Waiting to Happen
- How to Keep Red Hair from Fading in 2 Weeks?
- Ashy or Golden: Which Blonde Suits Pale Skin?
- When to Book a Root Touch-Up to Avoid Banding?
- The Risk of Orange Tones in Brown Balayage
- How to Calculate Cost Per Wear to See If Cheap Clothes Are Expensive?
- Foil vs Clay Lightener: Which Technique Creates the Best Balayage Blend?
How to Consult with a Client Who Wants « Instagram Hair » in One Session?
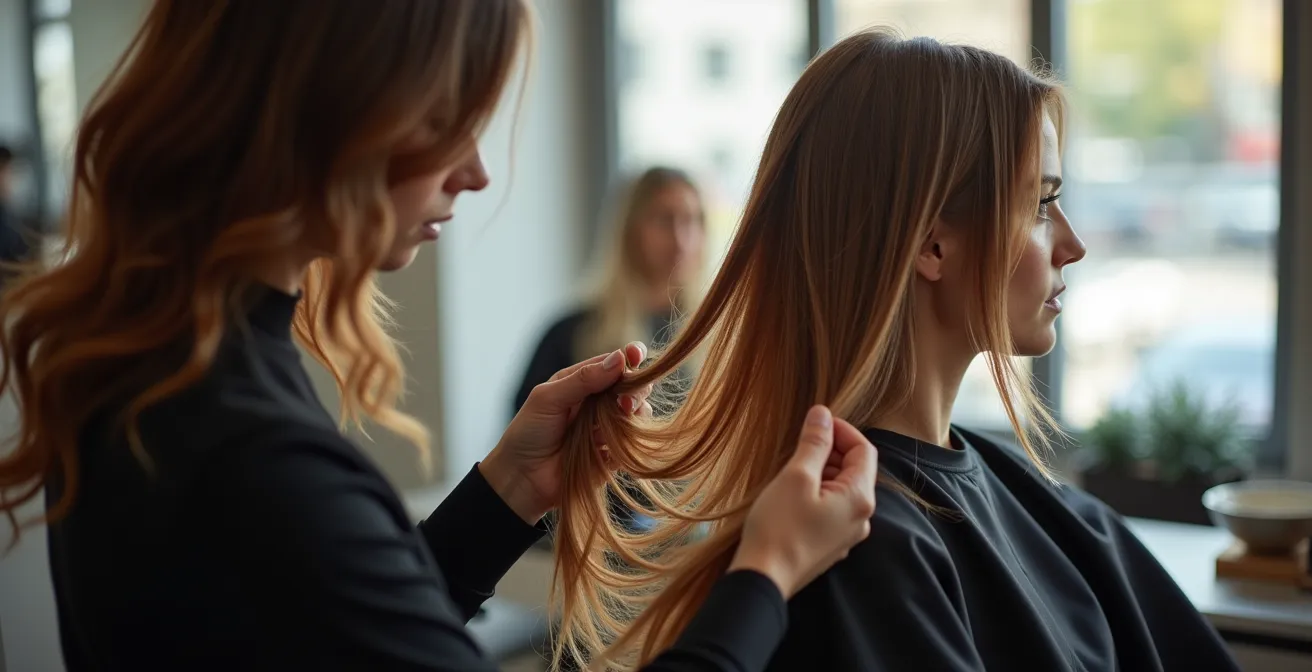
The « Instagram hair » phenomenon has created a fundamental disconnect between expectation and reality. Clients arrive with photos of dramatic, seamless transformations—often from dark to platinum blonde—believing it’s achievable in a single three-hour appointment. The truth is, these images are often the result of multiple, lengthy sessions, expert lighting, and digital editing. A master colorist’s first job is not to pick up a brush, but to be an educator and a manager of expectations. Attempting to rush a complex transformation is the fastest route to irreversible damage and a result that looks nothing like the photo.
Case Study: The Reality of a 16.5-Hour Transformation
To illustrate the chasm between social media and the salon chair, consider the work of colorist Kristen Ewing. She documented a transformation from 30 years of black box dye buildup to a beige blonde, a process that required a staggering 16.5 hours of work over two separate sessions. The journey involved what she described as « 1 million foils » and six different formulas to navigate the stubborn, unpredictable pigments. As detailed in a professional breakdown, the service was priced at $250 per hour, totaling $2,500. This example serves as a stark reminder that dramatic change is a high-cost, high-skill, and time-intensive investment, not an instant-gratification purchase.
A non-negotiable part of any major color service is a thorough consultation that moves beyond the inspiration picture. It’s a forensic investigation into the hair’s history and a realistic assessment of its future. This is where the true value of a professional begins, long before any color is mixed. Without this crucial step, you are not aiming for a target; you are gambling with your hair’s health.
Your Action Plan: Auditing Your « Instagram Hair » Dream
- Points of Contact: Gather all your inspiration photos. Be prepared to discuss what specifically you like about them—the tone, the placement, the blend—not just the overall look.
- Data Collection: Document your full 2-year chemical history. This includes every box dye, gloss, keratin treatment, or perm. Honesty is not optional; it’s a safety requirement.
- Check for Coherence: Confront the « Triangle of Expectations »—Time, Budget, and Desired Result. A professional can deliver two out of three. Decide which two are your genuine priorities.
- Assess Mementorability and Emotion: Allow your stylist to perform a mandatory strand and porosity test. This is the only way to know how your hair will lift and if it’s healthy enough for the journey. This is a diagnosis, not a suggestion.
- Create an Integration Plan: Based on the test results and your hair history, work with your stylist to build a realistic, multi-session roadmap. This plan is your contract with reality, moving you away from a one-shot fantasy.
The Risk of Bleaching Over Permed Hair: A Chemical Haircut Waiting to Happen
The single most dangerous assumption a client can make is that all chemical services are compatible. Bleaching over permed hair, or hair treated with certain box dyes, isn’t just risky; it’s a recipe for a « chemical haircut. » This is the industry term for hair that becomes so compromised it melts or snaps off, often right at the sink. The danger lies in the unseen war happening within the hair shaft. Perms and lighteners both target the same structural bonds, and subjecting them to this dual assault is an almost guaranteed path to destruction. This isn’t about skill; it’s about fundamental chemistry.
Box dyes present a similar, hidden threat. Many contain metallic salts, which are used to create a stronger bond between the color and the hair. These molecules are harmless on their own, but when a professional bleach containing ammonia is applied over them, it can trigger a dangerous chemical reaction. This exothermic reaction heats up rapidly, causing the hair to swell, steam, and in the worst cases, literally disintegrate. It’s a primary reason why disclosing your full hair history is a matter of safety, not just aesthetics.
Understanding the different bonds within the hair reveals why this is so critical. A professional doesn’t just « color » hair; they manage the integrity of these delicate structures.
| Bond Type | Function | Affected by Perm | Affected by Bleach | Recovery Time |
|---|---|---|---|---|
| Disulfide | Structural strength | Broken & Reformed | Permanently Shattered | Cannot recover |
| Salt | Temporary hold | Temporarily disrupted | Weakened | Hours to days |
| Hydrogen | Moisture & flexibility | Temporarily broken | Severely damaged | Days to weeks |
How to Keep Red Hair from Fading in 2 Weeks?
Red is not just a color; it’s a commitment. It is, by far, the most notoriously difficult shade to maintain. The reason for its fleeting nature lies in molecular science: the red color molecule is larger than those of other shades. This means it doesn’t penetrate the hair’s cortex as deeply and has a much weaker hold. As a result, it washes out more easily, leaving the color looking dull and brassy, sometimes in as little as two weeks. While box dyes promise vibrant red, they offer none of the aftercare strategy required to keep it.
Sunlight is another enemy of red hair. UV rays act like a bleach, breaking down the fragile pigment and accelerating the fading process. Similarly, hard water containing minerals like iron and copper can build up on the hair shaft, creating a film that distorts the color and robs it of its vibrancy. Keeping red hair brilliant requires a multi-pronged defensive strategy that goes far beyond simply using a « color-safe » shampoo. It involves temperature control, environmental protection, and targeted treatments to replenish the pigment that is inevitably lost.
This is where professional guidance becomes invaluable. A stylist can recommend a specific maintenance schedule and products tailored to your hair type and lifestyle, turning a frustrating battle into a manageable routine.
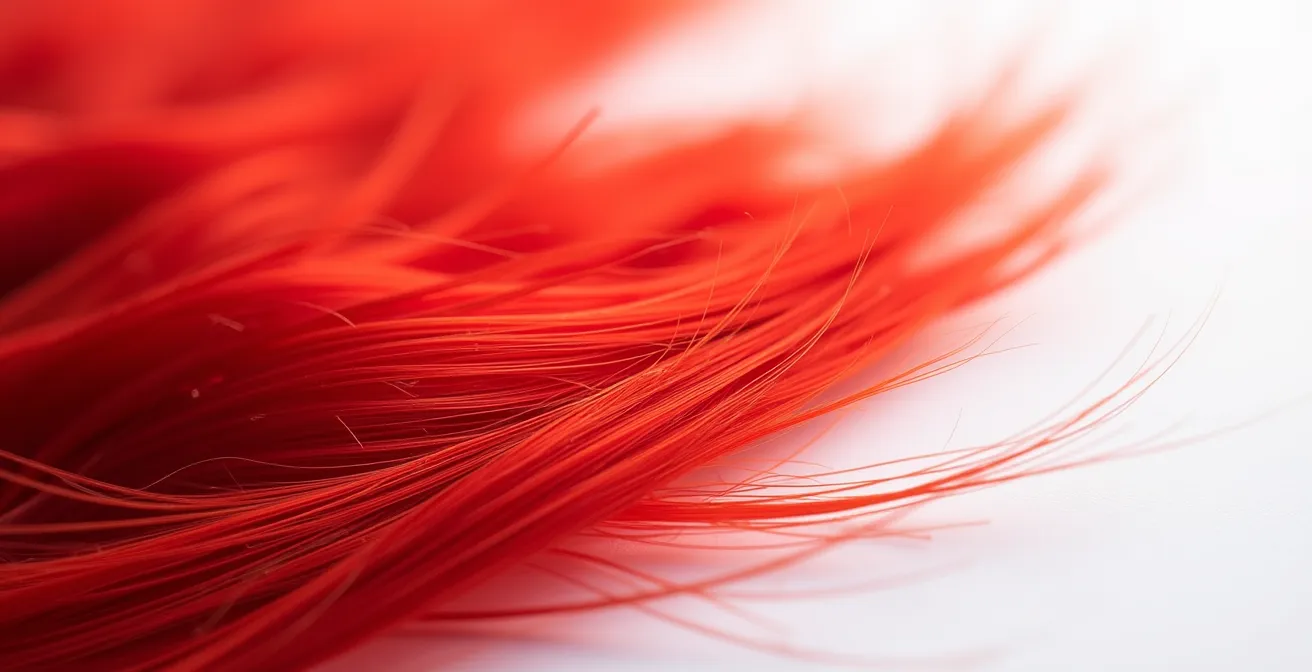
The microscopic view reveals the challenge: the large red pigments sit more precariously within the hair fiber. A successful red hair strategy is about sealing the cuticle and replenishing these molecules as they escape.
Three-Tier Red Hair Maintenance Strategy
- Tier 1 (Daily): Always rinse hair with cold water to seal the cuticle and lock in color molecules. Before any sun exposure, apply a UV protectant spray just as you would sunscreen for your skin.
- Tier 2 (Weekly): Use a color-depositing mask or conditioner formulated for your specific red tone to replenish lost pigment. Once a week, use a chelating shampoo to gently remove mineral buildup from hard water.
- Tier 3 (Monthly): Schedule a salon gloss treatment every 4-6 weeks. This professional service is the most effective way to refresh the tone, add immense shine, and seal the cuticle for longer-lasting color.
- Essential Add-ons: Install a shower head filter to reduce exposure to color-stripping iron and copper. Switch exclusively to sulfate-free, color-safe shampoos designed for red hair.
Ashy or Golden: Which Blonde Suits Pale Skin?
The conventional wisdom of « warm tones for warm skin, cool tones for cool skin » is one of the most oversimplified and misleading rules in hair color. While understanding your skin’s undertones is a good starting point, it’s only one piece of a much larger puzzle. For a professional colorist, the most critical factor is not your skin tone, but your hair’s natural underlying pigment. This is the color that is exposed as your hair is lightened, and it almost always leans warm—ranging from red to orange to yellow. Ignoring this fundamental property of hair is why so many at-home blonde attempts end in brassy, unnatural-looking results.
A master colorist uses color theory to neutralize these unwanted warm tones. For example, to achieve a neutral or ashy blonde on hair that lifts to an orange-yellow, a blue-violet based toner is required. The choice of toner is a chemical calculation, not a simple matching game. This expertise is what allows a stylist to create a beautiful blonde that complements your skin, even if it seems to defy the basic « rules. »
Professional Undertone Detection: The Jewelry & Fabric Test
Instead of the unreliable « vein test, » professionals use more definitive methods. In natural light, hold pure silver jewelry and then gold jewelry against your face. Then, compare how your skin looks against a crisp white fabric versus a cream-colored one. If silver and white make your skin look more vibrant, you likely have cool undertones. If gold and cream are more flattering, your undertones are warm. However, a true professional knows this is just one data point. They will always consider your hair color history, health, and texture, because how your hair lifts will ultimately dictate the path to the perfect blonde.
This is where the artistry and science of professional color truly shine, creating harmony where box dye creates conflict.
A person who pulls very orange when lightened needs an ashy (blue-based) toner to achieve a balanced, neutral blonde, even if their skin is technically ‘warm-toned’.
– Professional Hair Colorist Guidelines, Hair Color Neutralization Principles
When to Book a Root Touch-Up to Avoid Banding?
« Banding » is the dreaded result of an improper root touch-up: visible lines or stripes of different colors in the hair. It most often occurs when new color is overlapped onto previously colored hair, or when regrowth is left for too long. The primary cause is a difference in heat and processing. The first inch of hair from the scalp processes much faster due to the body’s natural heat—this is called the « incubation zone. » When you have more than an inch of regrowth, the hair further from the scalp is « cold » and processes more slowly. Applying one single formula to this entire area guarantees an uneven result: the hair near the scalp will be brighter (« hot roots »), and a dark band will appear where the old color meets the new regrowth.
This is a problem box dye is fundamentally unequipped to solve. A single, one-strength developer cannot account for these temperature variations. A professional, however, will often use multiple formulas and a precise application technique for a seamless blend. This might involve applying a stronger formula to the « cold » mid-band first, then a weaker formula to the « hot » scalp area for a shorter period. It is a meticulous, time-consuming process that justifies why professional root touch-up services typically cost between $55 and $135. You are not paying for color; you are paying for a perfectly blended, band-free result.
Waiting too long between appointments (generally more than 6-8 weeks) makes this process even more complex and costly, often turning a simple touch-up into a more expensive color correction service. The « one-inch rule » is the golden standard for preventing banding and keeping costs down.
Professional Technique: Formula Shifting for Longer Regrowth
- Measure Regrowth: If regrowth is under one inch, a standard formula can be carefully applied to the new growth only.
- Address the Mid-Band: For 1-2 inches of regrowth, a stronger formula (with a higher volume developer) is applied first to the « cold » band of hair that is 0.5 to 1.5 inches away from the scalp.
- Treat the Incubation Zone: A weaker formula (lower volume developer) is then applied to the half-inch of hair right at the scalp, which will process faster due to body heat.
- Stagger Processing Times: The mid-band area is allowed to process longer (e.g., 30-35 minutes) while the scalp area processes for a shorter time (e.g., 20-25 minutes).
- Constant Monitoring: A professional will watch the development every 5-10 minutes to ensure a seamless blend and prevent hot roots or visible bands.
The Risk of Orange Tones in Brown Balayage
One of the most common complaints after an at-home or inexperienced balayage attempt on dark hair is the appearance of unwanted orange or brassy tones. This is not a mistake; it’s a predictable outcome of hair chemistry. All hair, especially dark brown and black, has a « pigment underworld »—a foundation of red and orange undertones. When you lighten the hair, you are not simply adding blonde; you are stripping away the dark melanin to reveal these underlying pigments. Box dye kits and lighteners provide the bleach but lack the second, crucial step: toning. Without a toner to neutralize the exposed orange, brassiness is inevitable.
A professional stylist knows this underworld intimately. They use a color chart not just to choose the target color, but to predict the underlying pigment that will be exposed at each level of lift. They then select a toner with the opposite color on the color wheel to neutralize it. For the orange tones common in lightened brown hair, a blue-based toner is essential. For yellow tones that appear in darker blondes, a violet-based toner is used. This neutralization step is what creates a sophisticated, expensive-looking brunette balayage, rather than a patchy, brassy one.
This is a calculated, two-step process that a single box simply cannot replicate. It’s the difference between fighting your hair’s natural tendencies and expertly working with them.
| Hair Level | Natural Color | Underlying Pigment | Toner Needed |
|---|---|---|---|
| 1-4 | Black to Dark Brown | Red and orange undertones | Blue-green base |
| 5-7 | Medium Brown to Dark Blonde | Primarily orange and yellow undertones | Blue-violet base |
| 8-10 | Medium to Pale Blonde | Yellow undertones | Violet base |
How to Calculate Cost Per Wear to See If Cheap Clothes Are Expensive?
In fashion, « cost per wear » is a simple formula: divide the price of an item by the number of times you wear it. A $300 coat worn 100 times has a cost per wear of $3, while a $30 shirt worn once costs $30. This exact logic must be applied to hair color, as it reveals the false economy of box dye. A cheap initial purchase often leads to a disastrously high final cost once you factor in the inevitable correction. The box dye isn’t a $15 product; it’s a down payment on a $300 problem.
A professional color service is a front-loaded investment designed for longevity. The color is formulated to be stable, the application is precise to ensure an even fade, and the stylist provides a maintenance plan to extend its life. Box dye offers none of this. It often fades quickly and unevenly, forcing a new application or, more likely, a desperate call to a salon. The data is clear: on average, the average color correction appointment costs $210, with complex cases easily exceeding that.
When you analyze the numbers over a typical three-month period, the value proposition becomes undeniable. The « cheap » option is almost always the more expensive one.
Case Study: The Tale of Two Heads – A Cost-Per-Day Analysis
An analysis comparing the two paths over three months provides a clear financial picture. The Box Dye Path: A $15 initial purchase looks acceptable for about 14 days before significant fading or banding occurs. This requires a professional color correction, which typically costs $200-$300 for a 2-3 hour service. The total 3-month cost is $315, translating to a cost of $3.50 per day. The Salon Color Path: A $200 initial investment maintains its quality for at least 42 days (6 weeks). It then requires a standard $65 root touch-up. The total 3-month cost is $265, for a cost of $2.94 per day. In this realistic scenario, the professional service is 16% more economical, entirely bypassing the damage, stress, and time waste of the correction.
Key Takeaways
- The primary cost of color correction is not the dye, but the stylist’s time and forensic expertise required to navigate unknown chemical histories without causing catastrophic damage.
- Box dyes often contain metallic salts that are chemically incompatible with professional lighteners, creating a risk of exothermic reactions that can melt hair.
- True value is measured in « cost per day. » A stable, professional color service is consistently more economical over a three-month period than a cheap box dye plus its inevitable, expensive correction.
Foil vs Clay Lightener: Which Technique Creates the Best Balayage Blend?
The final layer of professional expertise lies in the choice of tools and techniques. For a service like balayage, the debate between using foils and a clay-based lightener is not a matter of preference, but of strategic choice based on the desired outcome and the hair’s condition. A client is paying not just for the color, but for the stylist’s knowledge of which tool to use, and when. This is a level of nuance that a box dye kit, with its single plastic applicator bottle, can never provide.
Foil is used for maximum lift and control. The foil traps heat, accelerating the lightening process, which is essential for lifting dark hair more than four levels or for breaking through previous color. It allows a stylist to create bright, high-impact ribbons of color and to keep sections neatly isolated, which is crucial when working on compromised hair. Clay-based lightener, on the other hand, is used for a softer, more subtle and diffused effect. It’s applied in the open air and dries to form a shell, processing more gently and slowly. It’s ideal for creating natural, sun-kissed looks on virgin hair.
Mastery, however, often involves using both tools in concert.
The most masterful balayage often uses both (‘Foilayage’) – foils for high-impact lift and brightness, combined with open-air clay lightener for a softer, more diffused effect.
– Advanced Balayage Techniques Manual, Professional Color Education Resources
A stylist’s decision tree is complex, weighing the client’s goal against the hair’s canvas. They might use a « Foilayage » technique to get bright highlights around the face, while using a clay lightener through the mid-lengths for a seamless blend. This thoughtful combination of techniques is the hallmark of a true artist and technician—and it’s a core part of what you invest in with a professional service.
The next time you’re in the hair care aisle, tempted by a $15 box, remember the chemistry, the risks, and the true cost. The most valuable investment you can make in your hair isn’t in a box, but in the expertise of a professional who can guarantee the result. Book a consultation, not a correction.