Pattern grading is not about resizing a garment; it is a disciplined process of geometric translation designed to preserve the designer’s original intent across a size range.
- Proportional harmony, not linear increments, is the absolute key to avoiding silhouette distortion.
- Fabric behavior, including weight and shrinkage, must be engineered into the grade rules from the very beginning.
Recommendation: Treat the base block pattern as a sacred geometric blueprint and apply all grade rules with mathematical precision, validating every step against the original design’s core proportions.
The transition from a perfect sample size to a full production run is where countless designs lose their integrity. The shape is subtly off, the drape is wrong, and the intended silhouette—the very soul of the garment—is compromised. The common culprit is a fundamental misunderstanding of pattern grading. Many in the industry treat it as a purely mechanical task of making a pattern bigger or smaller, applying generic increments based on a spec sheet while ignoring the three-dimensional form and the fabric’s properties.
This approach focuses on hitting target measurements but fails to respect the artistry of the original design. But what if we approached grading not as clerks, but as engineers? The true discipline of technical design lies in preserving the proportional harmony and geometric integrity of the initial silhouette. This is not about simple resizing; it is a calculated act of dimensional translation. A perfect grade maintains the balance, lines, and emotional feel of the garment, ensuring a customer who wears a size 16 experiences the same design intent as the one who wears a size 6.
This comprehensive guide deconstructs the core principles of precision grading from a technical designer’s perspective. We will move beyond the basics of « slash and spread » to explore the critical variables that separate an adequate fit from a perfect one. From drafting a flawless foundational block to diagnosing subtle fit errors and understanding fabric dynamics, we will establish a framework for ensuring the designer’s vision remains pristine and undistorted, no matter the size.
To navigate this complex but essential discipline, this article breaks down the key areas of mastery. The following sections provide a structured path through the critical considerations, from human-centric fitting to the mathematical precision required in production.
Summary: A Technical Designer’s Guide to Flawless Pattern Grading
- Why Fit Models Are Superior to Mannequins for Production Fittings?
- The Shrinkage Calculation Error That Ruins Mass Production Runs
- Flat Pattern Making vs Draping: Which Yields Better Results for Tailoring?
- How to Reduce Fabric Consumption by 5% Through Better Marker Making?
- What Causes the « Drag Line » on Trousers and How to Fix It?
- How to Draft a Basic Block Pattern for a Bodice Correctly?
- Why Fabric Weight Determination Is Critical for the Final Drape?
- Why Draping Teaches Fabric Behavior Better Than Flat Pattern Making?
Why Fit Models Are Superior to Mannequins for Production Fittings?
A dress form, or mannequin, is a static representation of the human body. It provides a consistent geometric reference for volume and basic shape, which is invaluable during initial draping and pattern drafting. However, it is a fundamentally flawed tool for final production fittings. Garments are not static sculptures; they are dynamic systems that must interact with a living, breathing, moving body. This is where the fit model becomes an indispensable asset, providing feedback that a mannequin simply cannot.
A fit model offers kinetic and sensory data. They can articulate precisely where a seam pulls, an armhole restricts movement, or a pocket is inaccessible. As Business of Fashion notes, a fit model is a « living, breathing mannequin » who helps identify issues that directly impact sales, such as shallow pockets or uncomfortably tight armholes. This feedback is critical for validating the proportional harmony of a grade across a range of motion. A garment that looks perfect on a static form can reveal significant flaws the moment the wearer sits, walks, or reaches for an object.
The financial investment in a professional fit model reflects their immense value in risk mitigation. A top-tier professional working with brands like Calvin Klein can command significant hourly rates, as their expertise prevents costly production errors that could ruin an entire run. For instance, in major fashion hubs, it’s not uncommon for fit models at luxury fashion houses in Paris to earn €125-250 per hour. This cost is minimal compared to the expense of thousands of unsellable garments resulting from a fit issue that a static mannequin failed to reveal.
The Shrinkage Calculation Error That Ruins Mass Production Runs
One of the most catastrophic and easily avoidable errors in mass production is the miscalculation of fabric shrinkage. A technical designer can create a perfectly graded pattern, but if the shrinkage properties of the chosen fabric are not precisely accounted for, every single garment in the production run will be the wrong size. This is not a design flaw; it is an engineering failure. Fabric is an active material, and its reaction to washing, dyeing, and finishing processes must be treated as a critical variable in the manufacturing equation.
The industry has standards for a reason. For most woven and knit fabrics, national standards control fabric shrinkage within a 3-4% maximum tolerance. However, relying on a supplier’s spec sheet is insufficient. A diligent technical team must conduct its own rigorous testing, as variations between production lots can and do occur. This testing must differentiate between warp (lengthwise) and weft (crosswise) shrinkage, as they often differ and require separate compensation in the pattern grade.
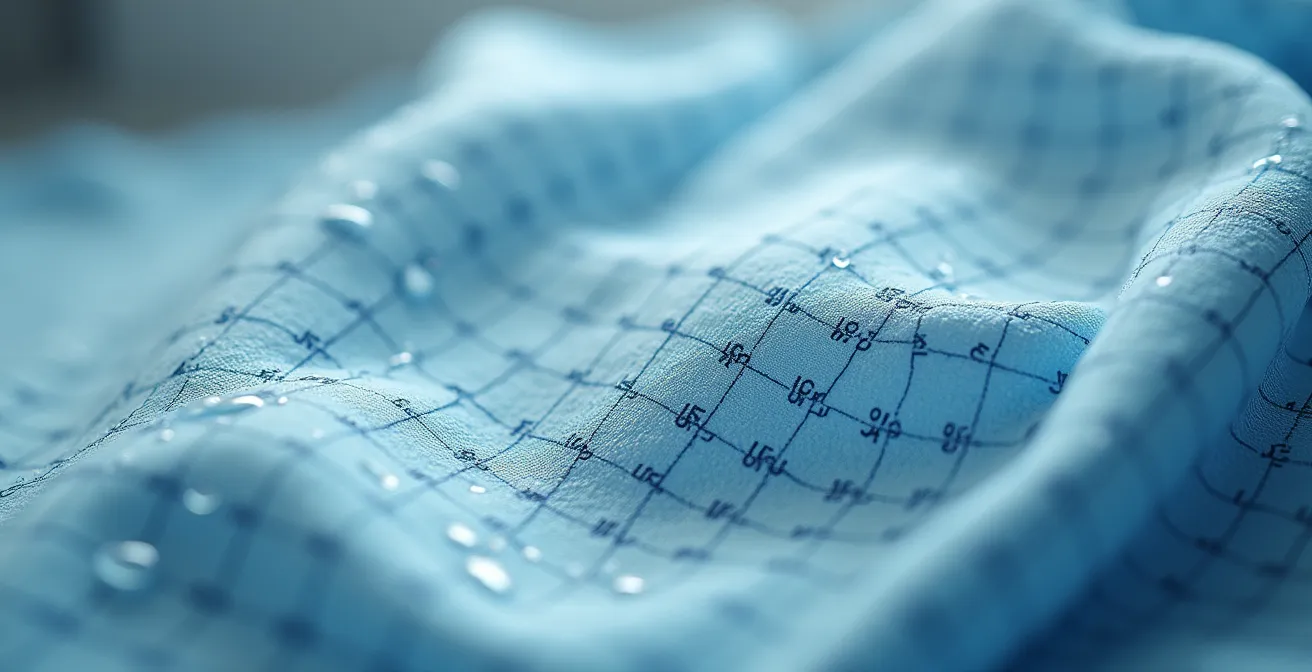
The process is methodical and must be executed with scientific precision to yield reliable data. Without this diligence, a 5% unaccounted shrinkage on a 100cm trouser length results in a 5cm loss, a difference that can render the entire production run unwearable and unsellable. The financial implications are immense, turning projected profits into a total loss.
Action Plan: Implementing a Professional Shrinkage Test
- Sample Sourcing: Cut fabric samples of a specific size from the central area of the roll, deliberately avoiding the selvage edges where tension may differ.
- Grid Preparation: Use a precision ruler and marking tool to create a clear shrinkage grid on each fabric swatch, establishing a baseline for measurement.
- Controlled Testing: Subject the samples to multiple wash and dry cycles that precisely replicate the intended care instructions and any production-level finishing processes.
- Data Calculation: Calculate the separate warp and weft shrinkage percentages using the formula: [(Pre-wash dimension – Post-wash dimension) / Pre-wash dimension] x 100%.
- Validation Protocol: Repeat the entire test at least three times for each fabric direction (warp and weft) and average the results to ensure statistical accuracy and account for any anomalies.
Flat Pattern Making vs Draping: Which Yields Better Results for Tailoring?
The debate between flat pattern making and draping is not about which method is « better » but which is the appropriate tool for a specific design challenge. Each discipline offers a distinct advantage, and the most sophisticated technical designers understand how to leverage both. Flat pattern making is a science of two-dimensional geometry, while draping is an art of three-dimensional sculpture. For precision tailoring, a hybrid approach often yields the most superior results.
Flat pattern making is the language of mathematics and logic. It involves drafting patterns on a flat surface using precise measurements and geometric formulas. This method excels in creating structured, technical garments where accuracy and repeatability are paramount. It is the only practical way to apply logical grade rule logic for scaling sizes. Its strength is its precision.
Draping, conversely, is an intuitive and sculptural process. It involves manipulating fabric directly on a dress form to create the silhouette. This method allows the designer to see how a fabric’s weight and bias will behave in real-time, making it ideal for creating fluid, bias-cut garments or unconventional shapes that are difficult to conceptualize in two dimensions. Its strength is its ability to capture the fabric’s soul and the garment’s emotional feel.
A comparative analysis from sources like the Fashion Institute of Technology’s technical design guide highlights the ideal uses for each method. The perfectionist’s approach is not to choose one over the other but to integrate them into a seamless workflow.
| Aspect | Flat Pattern Making | Draping |
|---|---|---|
| Best For | Geometric designs, technical outerwear | Bias-cut garments, unconventional silhouettes |
| Precision Level | Mathematical accuracy | Artistic interpretation |
| Speed | Faster for simple designs | Time-intensive exploration |
| Grading Ease | Logical, scalable grade rules | Requires conversion to flat for grading |
| Learning Curve | Technical skills required | Intuitive, hands-on approach |
The optimal workflow, as many experts advocate, is a hybrid one. Use draping to establish the core silhouette and emotional character on the sample size. Then, true that draped form into a precise flat pattern, correcting lines and ensuring perfect balance. Finally, use the principles of flat pattern making to apply grade rules, ensuring the artistic intent discovered through draping is translated with geometric integrity across the entire size run.
How to Reduce Fabric Consumption by 5% Through Better Marker Making?
In manufacturing, efficiency is profit. While designers focus on the aesthetic, technical designers must focus on the engineering, and nowhere is this more critical than in marker making. A marker is the precise layout of all pattern pieces for all required sizes on the fabric before cutting. An inefficient marker wastes fabric, and wasted fabric is wasted money. A 5% reduction in fabric consumption through superior marker making can dramatically improve a product’s profit margin without compromising the design.
The key to high-efficiency markers lies in pattern engineering and leveraging technology. This involves scrutinizing every pattern piece to identify opportunities for optimization. For example, a large, awkwardly shaped piece might be split into two smaller, more geometrically regular pieces connected by a new seam. If the new seam is aesthetically acceptable or can be hidden, the change can allow for a much tighter nest of pieces on the marker, significantly reducing waste.
However, this optimization cannot come at the cost of quality. Critical constraints must be respected at all times. These include the fabric’s grainline, nap direction (for fabrics like velvet or corduroy), and any required matching for prints or plaids. The goal is to balance maximum yield with absolute adherence to quality control standards. In the modern era, this complex puzzle is best solved by Computer-Aided Design (CAD) systems. As noted in an analysis of modern production methods, PLM platforms with CAD nesting algorithms can test thousands of marker combinations in minutes, achieving efficiency yields that are humanly impossible, which is especially vital for sportswear requiring extra ease for movement.
What Causes the « Drag Line » on Trousers and How to Fix It?
Drag lines are the technical designer’s enemy. These unsightly diagonal or horizontal wrinkles on a garment, particularly trousers, are not random occurrences; they are clear, physical indicators of a flaw in the pattern’s geometry. They signal that the fabric is being pulled under tension because the pattern’s shape does not correctly conform to the three-dimensional form of the body. A perfectionist technical designer reads these lines like a map, diagnosing the root cause and engineering a precise solution.
Each type of drag line points to a specific problem. For example, « smile lines » under the seat almost always indicate that the crotch depth is insufficient, causing the fabric to strain horizontally. Horizontal lines across the lap when standing can suggest a posterior pelvic tilt that hasn’t been accounted for in the back rise angle. Understanding this diagnostic language is essential for efficient problem-solving during a fitting.

Fixing drag lines is a matter of surgical adjustments to the pattern, not just shifting fabric on a model. The solution must address the root geometric imbalance. This requires a deep understanding of how changes in one area, like the crotch point angle, will affect the drape and hang of the entire leg. A comprehensive diagnostic map of common drag lines is an invaluable tool for any technical designer’s arsenal, allowing for quick and accurate identification of the underlying issue.
| Drag Line Type | Location | Root Cause | Solution |
|---|---|---|---|
| Smile Lines | Under seat | Insufficient crotch depth | Increase crotch depth measurement |
| Horizontal Lines | Across lap | Posterior pelvic tilt | Adjust back rise angle |
| Diagonal Lines | Hip to inseam | Crotch point angle off | Pivot crotch point during grading |
| Vertical Lines | Side seam | Uneven grade distribution | Rebalance grade rules |
Ultimately, eliminating drag lines is the final exam for a pattern’s geometric integrity. It is the visual proof that the two-dimensional pattern has been successfully translated into a three-dimensional form that respects the body’s contours and movement, resulting in a clean, flawless silhouette.
How to Draft a Basic Block Pattern for a Bodice Correctly?
The basic block, or sloper, is the single most important tool in pattern making. It is the foundational blueprint from which all other designs are derived. It is a pure, unadorned representation of a specific set of body measurements, containing only the necessary wearing ease for movement and no design ease whatsoever. Any error, however small, in the drafting of this block will be magnified and propagated through every subsequent pattern and every graded size. Therefore, its creation demands absolute precision.
Correctly drafting a bodice block begins with taking meticulous measurements. A single bust measurement is insufficient. At a minimum, one must take the high bust, full bust, and apex-to-apex measurements to accurately position the bust dart and capture the true volume of the chest. Establishing non-negotiable reference points is the next step. A central vertical grainline and horizontal balance lines (HBLs) at the chest, waist, and hip are critical for ensuring the pattern is symmetrical and for verifying the accuracy of the grade later on.
The most crucial concept to grasp when drafting the block is the separation of ease. The block should only include minimal wearing ease—typically 1-2cm—to allow the body to breathe and move. All design ease, which creates the garment’s style and silhouette (e.g., a loose-fitting blouse vs. a tailored jacket), is added later in the design development process. Mixing design ease into the base block contaminates its geometric purity and makes accurate grading impossible.
This precision is informed by a key anthropometric principle. As expert pattern maker Natalie Smith of Points of Measure explains:
As we grow up we are typically growing by both height and width, but as we hit adulthood we no longer grow by height. In adulthood, height stays constant while width fluctuates. This is especially important to think about when designing for plus and petite size ranges.
– Natalie Smith, Points of Measure – Grading Tutorial
This insight is fundamental to grade rule logic. It means that for adult sizing, grade rules must focus on proportional changes in width, not uniform scaling, to avoid distorting vertical proportions and maintain silhouette integrity.
Why Fabric Weight Determination Is Critical for the Final Drape?
A pattern is a geometric hypothesis. The final garment is the result of testing that hypothesis against the physical properties of a chosen material. A common failure in technical design is to treat all fabrics as interchangeable canvases for a pattern. In reality, the fabric’s weight, measured in grams per square meter (GSM), is a critical variable that fundamentally dictates the garment’s final drape, structure, and silhouette. Ignoring it is an engineering oversight that guarantees a disconnect between design intent and final product.
A lightweight fabric like a silk chiffon (e.g., 20-40 GSM) will have a fluid, airy drape, clinging to the body and revealing its contours. A heavyweight wool suiting (e.g., 300-400 GSM) will have a structured, architectural drape, creating its own shape and standing away from the body. Applying the same pattern to both fabrics will produce two radically different garments. Therefore, the base block and subsequent style patterns must be drafted with a specific fabric weight and type in mind.
Fabric weight also has a direct correlation with other critical behaviors, such as shrinkage. For example, lower-density fabrics or knitted structures with larger voids tend to absorb more water, which can lead to more significant shrinkage. It’s not unusual for certain natural fibers to experience up to 5-7% shrinkage after processes like garment dyeing. This factor must be built into the pattern’s calculations. A heavier, denser weave of the same fiber may shrink less, requiring a different shrinkage allowance. These are not minor details; they are core engineering parameters.
Ultimately, fabric weight determines how gravity interacts with the garment. The technical designer’s job is to anticipate this interaction and build it into the pattern’s DNA. A pattern graded for a lightweight jersey will require different ease and balance than one graded for a heavy denim. To ignore fabric weight is to cede control of the final silhouette to chance.
Key Takeaways
- Grading is a discipline of preserving proportions, not simply resizing a pattern.
- Fabric properties, especially shrinkage and weight, are non-negotiable engineering variables that must be factored into grade rules.
- The most superior results are often achieved through a hybrid workflow that combines the artistic intuition of draping with the mathematical precision of flat pattern making.
Why Draping Teaches Fabric Behavior Better Than Flat Pattern Making?
While flat pattern making is the language of precision and logic, draping is the language of intuition and material dialogue. For a technical designer seeking to truly master their craft, proficiency in flat pattern making is the requirement, but an intimate understanding of draping is what builds true expertise. Draping teaches a lesson that no textbook or CAD program can: how fabric behaves under the forces of gravity, tension, and shape. It is a direct, hands-on education in material science.
When you drape, you are not imposing a pre-determined shape onto the fabric. Instead, you are in a conversation with it. You learn where a particular silk charmeuse wants to fall on the bias, how a stiff organza creates volume, or how a knit jersey responds to tension. This tactile experience builds a deep, instinctual knowledge that cannot be replicated by drafting lines on paper or a screen. It moves your understanding from the theoretical to the tangible.
This hands-on process allows for immediate visual feedback and happy accidents—discoveries that would never occur in a purely two-dimensional workflow. It is this exploratory nature that makes draping such a powerful tool for learning. As the Fashion Institute of Technology library points out when referencing visual resources for technical design, some of the most effective learning tools have no verbal instructions, allowing for a pure, visual absorption of how to explore the drape of a garment.
These beautifully produced videos have no verbal instructions. Great for visual learners. Series includes deep dives exploring drape of famous couture pieces.
– Fashion Institute of Technology Library, Technical Design Resources
This knowledge, gained through the sensory experience of draping, is then brought back to the flat pattern. A designer who understands fabric’s inherent personality can draft more intelligent patterns and create more sophisticated grade rules. They can anticipate how a grade will affect the drape because they have felt it in their hands. Flat pattern making provides the « how » of scaling, but draping provides the crucial « why » behind the fabric’s response, completing the full circle of technical expertise.
To truly master garment fit and preserve a design’s soul across every size, you must adopt this engineering mindset. Begin by treating every pattern not as a mere outline, but as a precise geometric formula waiting to be solved with diligence and precision.